

View and edit audio files directly in the Mac Finder.
Download 100 day free demo Buy NowWhen you select an audio file in the Mac Finder, Snapper immediately appears right beneath the current window, showing you the wave form.
Hit the space bar or double-click in the wave form to play. Or use auto-play to start playing the moment you select the file. Vari-speed is available too.
In the Snapper wave form you can select a part of the sound file and:
All of them.
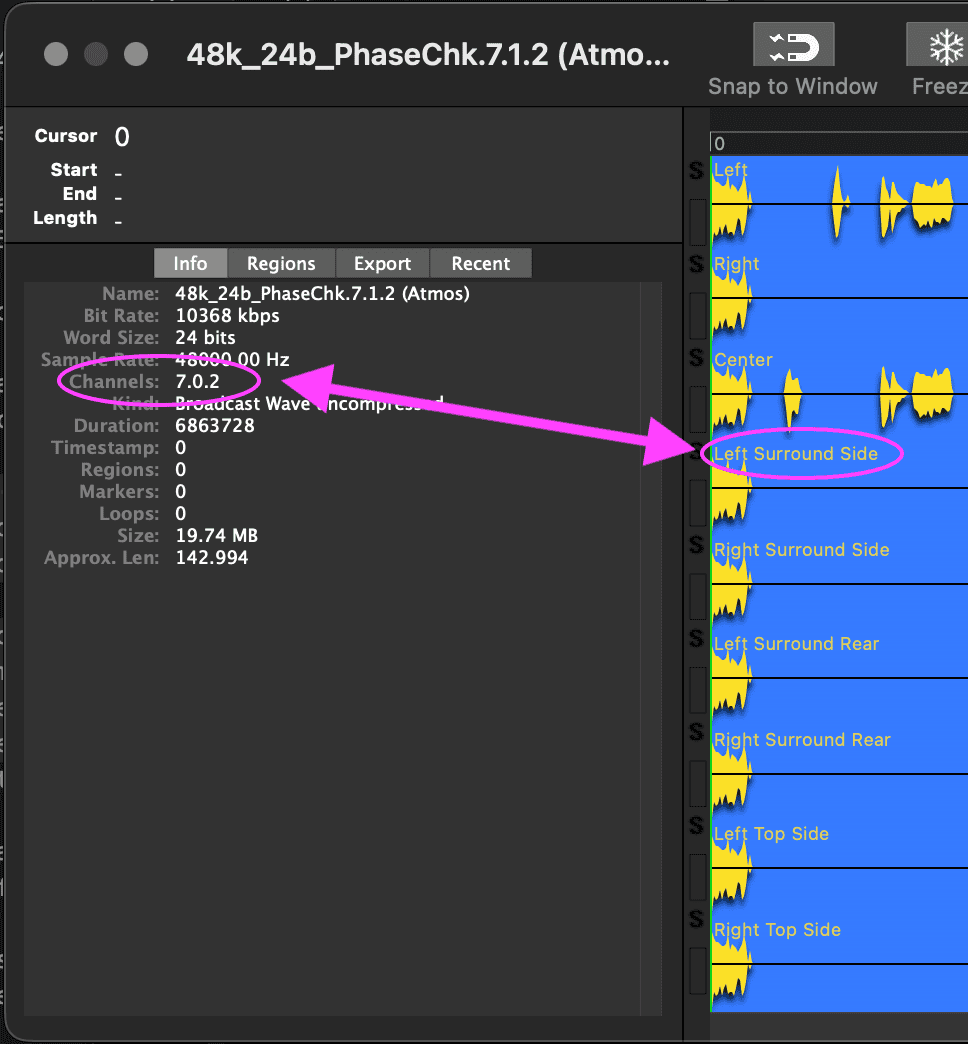
Snapper opens over 50 sound file formats. That includes compressed files, split stereo, 192 kHz, surround files from 5.1 and 7.1 to 7.0.2 and 9.1.6 Dolby Atmos, CDs and videos containing audio.
Snapper shows loops, markers, timestamps, regions, BWF annotations, even album covers. You name it, Snapper can handle it.
Snapper follows your file selection in the Finder. It shows a wave form as soon as you select an audio file.
You can drag (selections from) files directly to the cursor of your sequencer or audio editor.
After purchase you receive a personal activation code to unlock the Snapper demo.
Everything, for one hundred (100!) days. After that it simply stops working. You can download the demo here.
Snapper also adds an informer that communicates all metadata within WAV files to MacOS Spotlight, so you can search and find Sound FX metadata in the Finder. This includes, BEXT, Copyright, creator, annotations, comments etc.
 On top of that Snapper embeds the Universal Category System so you can look for synonyms and category explanations. Snapper displays the entire category and subcategory names, rather than their abbreviations.
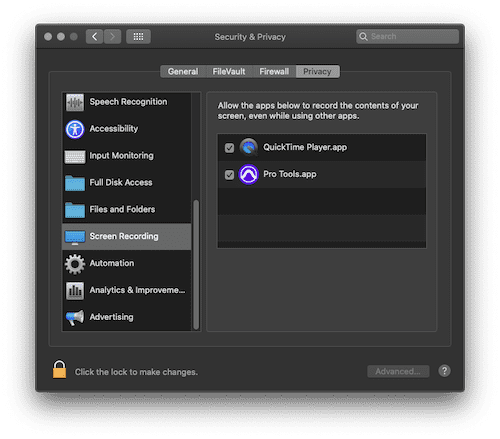
The Spotlight informer requires at least MacOS 10.14 Mojave. It takes a while for your library to be rescanned by spotlight, but you can trigger priority for you sound FX library by adding it’s top level folder to to the ‘privacy’ list in System Preferences Spotlight, and then removing it again form the list.
Check out these three videos to get more in depth information on Snapper. Learn more about play functions, freeze mode, short keys. Find out about various display options, zooming, converting to different formats, drag export, and more...
The Snapper demo works 100 days without any limitation. You can testdrive Snapper properly this way. Prepare to get hooked.
If you like the demo you can purchase an activation key code to unlock the demo to the full version.
Download the Snapper 3.1.6 demoInstalling the latest Snapper demo will update any installed Snapper (full or demo) to the latest version.
To read or export some audio file formats third party software is required. Here's a list of optional packages you can install to get all out of Snapper.
The latest Snapper 3 is a fully 64 bits universal application supporting the latest macOS 26 (Tahoe), macOS 15 (Sequoia), 14 (Sonoma) & 13 (Ventura).
Version 3.1.0 adds native compatibility for the Apple silicon (ARM/M1/M2/Metc) computers to ensure Snapper snaps on the modern macs too.
The update to Snapper 3 is free for all registered Snapper 2 users.
Simply download Snapper 3 and drag the app to your applications folder (make sure the old Snapper app is not running) and that will get you fully up to date.
Download the Snapper demo. It works without any limitation the first 100 days ! After this you can unlock the app by purchasing a key code.
You can unlock the Snapper demo (on all your computers) using the key code you receive when you purchase Snapper.
If you lost your key code to unlock the Snapper demo, you can have it resend to you here.
To enable mp3 output or FLAC input some optional codecs need to be downloaded and installed.
Give us a call or send us an email and we will get back to you as soon as possible!
+31 30 244 6335
| AAX: | /Library/Application Support/Avid/Audio/Plug-Ins/ |
| AU: | /Library/Audio/Plug-Ins/Components/ |
| VST3: | /Library/Audio/Plug-Ins/VST3/ |
/Library/ScreenSavers/
| AAX: | /Library/Application Support/Avid/Audio/Plug-Ins/ |
| AU: | /Library/Audio/Plug-Ins/Components/ |
| VST: | /Library/Audio/Plug-Ins/VST/ |
 "Speakerphone / Altiverb cannot run, because an error occurred. Encrypted Channel Bad Channel ID (or USB error or frame is an invalid size)"
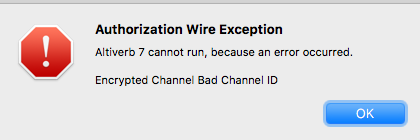
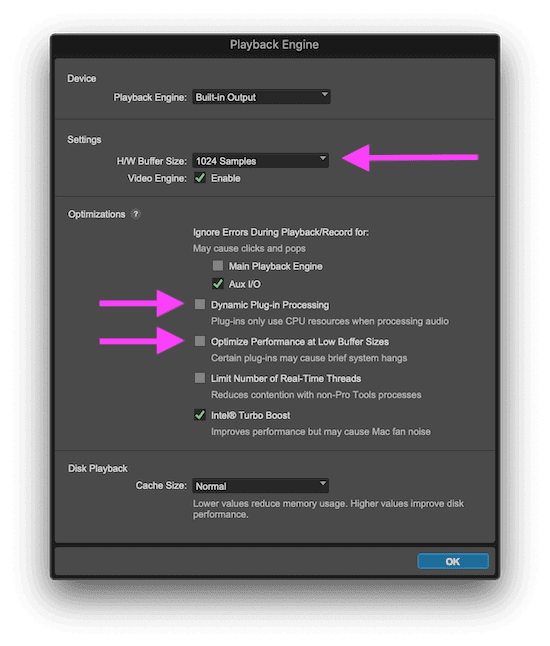
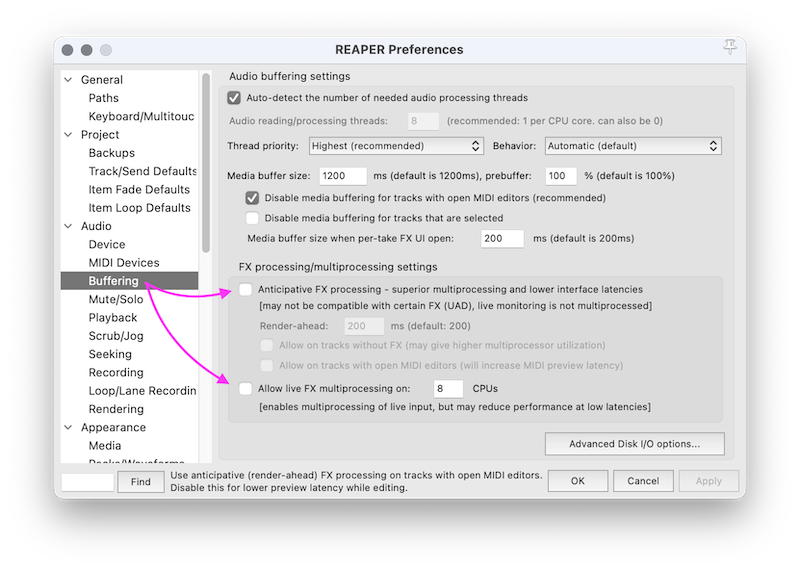 1. Audio -> Buffering
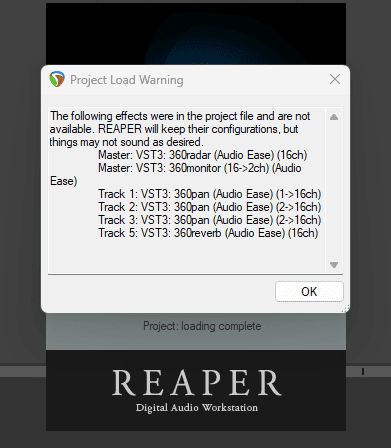
While Altiverb 8 is backwards compatible with Altiverb 7 there are some big changes in the multichannel Altiverb 8 implementation that changes the output of the 5.x channel plug-in specifically.
There are three types of '5.x' Altiverb instances in use:
Type 1: the fivefold multi-mono type. Altiverb 8 sounds identical to Altiverb 7 in this one.
Type 2: Mono or stereo input to 5.x out: this instance is 3dB louder than Altiverb 7, and otherwise identical. We can no longer fix this without breaking more sessions than it fixes. A -3dB Trim after your Altiverb 8 will fix this.
Type 3: The 5.x in 5.x out version of Altiverb 8 does not sound the same as Altiverb 7.
It sounds similar at cloud-size maximum (loading the old quad IR with center beed and all), but the level does not match. A fundamental internal routing change that allows for the new cloud-size feature breaks this backward compatibility.
Only Type 3 is trouble when migrating from v7 to v8.
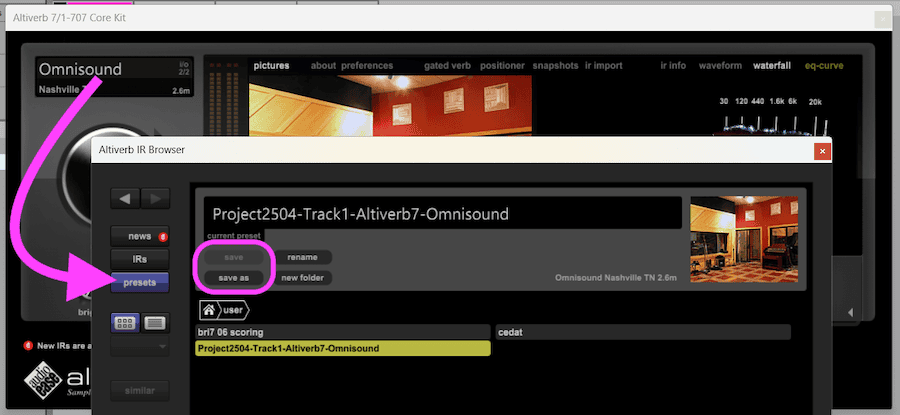
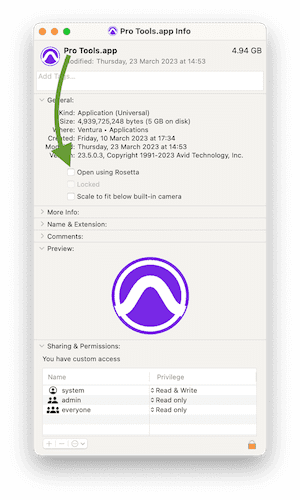
If you need to pick up an Altiverb 7 session with (type 3) 5.0 to 5.0 output reverbs then use Altiverb 7 to be safe (if on silicon, with pro tools in rosetta mode). A v7 license will be supplied if you ask for it. If you want to move forward and use Altiverb 8 anyway, check the level of the reverb and adjust it.
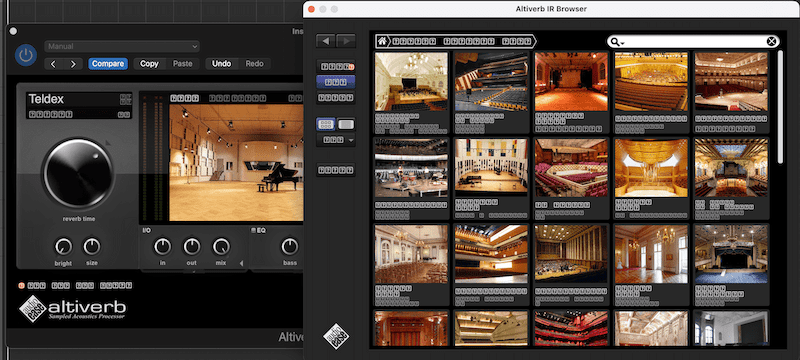
While you are at it, it is best to change the chosen IR to one that is true 5.0, rather than load the old Altiverb 7 quad-with-center-bleed type.
The full note from the 8.0.7 update
note 1:
Levels are improved in Backward compatibility situations for the Altiverb 7 instances with input-output: quad to quad, 5.0 to 5.0 and 5.1 to 5.1.
Altiverb is a music and post reverb. The 5.0-in 5.0-out Altiverb, however is mainly targeting post. The 5.0-in 5.0-out Altiverb 8 loads new true 5.0 IRs by default, implements easy center-channel-only reverb with input pan following and adjustable cloud size. For Post this instance has undergone massive improvements and it was the most challenging to keep it backward compatible.
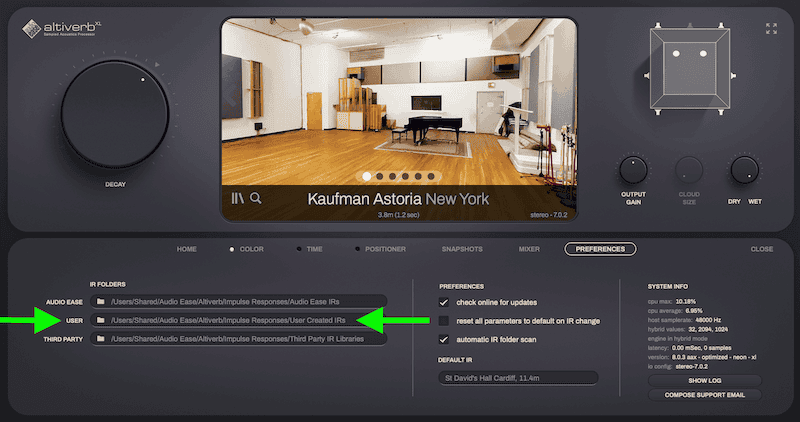
In a 5.0 input to 5.0 output instance of Altiverb 7 a stereo to quad output IR was loaded by default, mainly because no 5.0 IRs existed in Altiverb 7. Center reverb was created via the center bleed option, a delayed mix of the rear channels in the front. Altiverb 8 will load the IR that was chosen in Altiverb 7, including the center bleed. You may, as we do, prefer the native Altiverb 8 way: if you have just upgraded to v8 when opening your Altiverb 7 project or template we advise you to open your Altiverb 5.0 input to 5.0 output instances and load the true 5.0 Impulse Response in there. One should be available for most Impulse Responses in the Altiverb collection.
When cloud size is increased it gradually adds speakers which increases the total level. Cloud size did not exist in Altiverb 7. In Altiverb 8 5.0 input to 5.0 output Altiverb 7 settings are loaded with 60% cloud size, which may result in a higher output level than in Altiverb 7 produced, depending on different circumstances.
Similar measures have been taken in the quad input quad output and the 5.1 input 5.1 output instances. Please note that all of the above only applies to Altiverb 7 settings received by Altiverb 8.
/Library/ScreenSavers/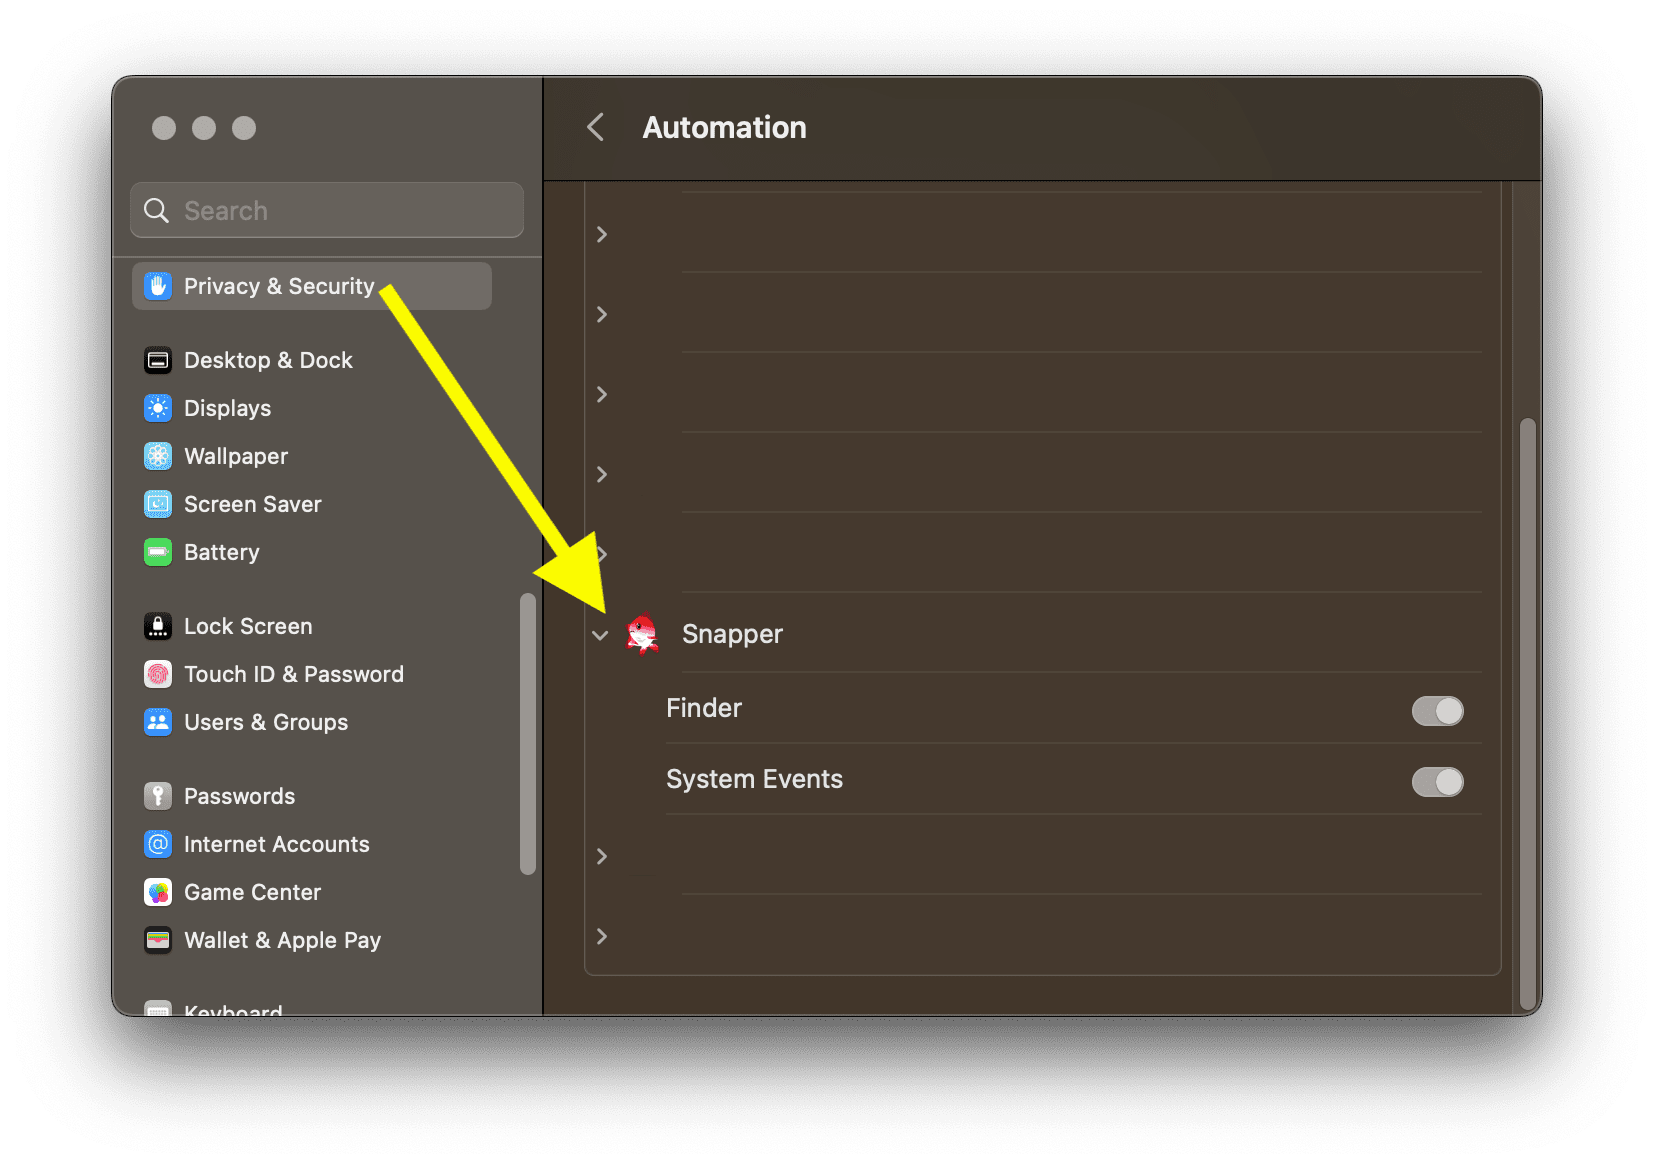


Connect with us to stay up to date