A bad GSM connection on a busy sidewalk, a bullhorn with feedback and a helicopter overhead, or a 1952 rockabilly guitar amp in a recording studio live room:
The Speakerphone audio plug-in gives you authentic speakers of any size together with their natural environments.

  Watch the video

All the walkie-talkies, distant transistor radios, upstairs TV sets, bullhorns, cell phones and guitar cabinets you will ever need. Speakerphone (a plug-in for MacOS and Windows) will add dial tones, operator, static, and you can select from a wealth of ambiences on either the caller or receiver's end.

400 speaker impulse responses, 23 microphones, 106 'Covers' (from blankets to car trunks), 53 Altiverb rooms and outdoor spaces, 5 gigabyte of ambiences and sound FX, and 12 DSP modules from Leslie to GSM compression, conveniently presented to you in well over 500 presets.

Take the tour by watching the video here or scroll down for some audio examples.


Buy now Features Specifications New in 3

LISTEN !

Listen to presets applied on a studio recording.

Features

Check all features, all DSP options explained.

F A Q !

Answers to your questions, background information, see the faq below.

System requirements

Check if the Speakerphone plug-in will run on your system.

PDF Manual

Search and find what you need to know in the Speakerphone 3 pdf manual.

Download

Download Speakerphone.
For registered users only.

Audio examples

Hit one of the buttons below to listen to the Speakerphone preset.

POST voice demo

Speakerphone transforming a normal voice recording into an anouncer including environments.

Megaphone in street
K2 summit to base camp
Stadium PA
Station - cant hear it
Party at the neighbors
Radio in the back of an office
This is your captain speaking
Helicopter intercom - 1q understandable
Helicopter intercom - half understandable
Dry voice

Robot demo

Turning a normal voice recording into a robot.

Central scrutinizer
Female HAL
Larynx
Plastic voice synth robot
Whispering robot
Dry voice

Music vocal demo

Speakerphone mangling Trent Reznor from Nine Inch Nails

B18 cabinet in bedroom
Babyphone toy
Fedtro Megaphone
Mac SE
Sabina radio
Walkie talkie
Dry vocal recording

NEW IN SPEAKERPHONE 3

Improved automation reliability

  • reducing conflicting situations between presets, automated presets and automation curves.
  • reduction of not found IRs (Speaker, Mic, Cover & Room), inherited from Speakerphone 1 preset/settings, that could resolve to default IRs.
  • removal of the auto level function alltogether, this is replaced by a suggested level area in the input meter.
  • samplebay on/off is now available for automation.
Native apple silicon support

Native Apple silicon

M1 / M2 / M3 & Intel macs are fully supported.

Resizable user interface

New interface

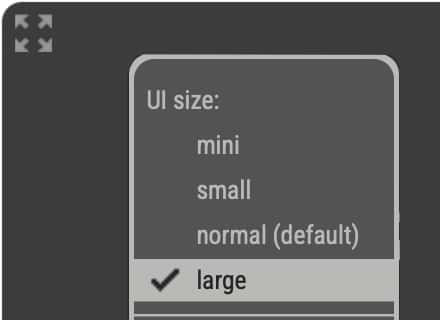
The user interface has been refined and made scalable to ensure Speakerphone with all its controls remains visible and controllable for most.

Speakerphone 3 seemless automation

Smooth and clickless

Speaker, Mic, Cover and Room IR switches are all practically seemless without any clicks, also with automation.

New room IRs in Speakerphone 3 time

New outdoor & car IRs

A street with high office buildings, an outdoor stadium, a village square, a Tesla, a camper van and various tubes are added as impulse repsonse option in the convolution reverb module (the Room module).

Speakerphone 3 input level indicator

New input level meter

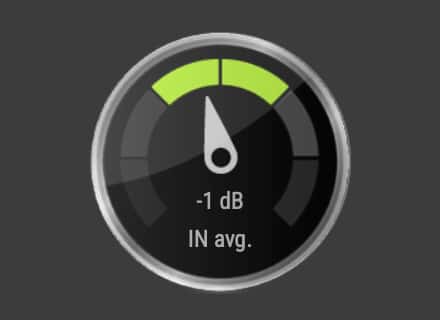
The auto level option from Speakerphone 2 has been removed. To ensure the incoming audio is in good balance with the sound generating modules from Speakerphone the input level meter shows a green area for the best input level. You can simply adjust the input level to ensure the presets sound as intended.

New speaker IRs featured in Speakerphone 3

New Speaker IRs

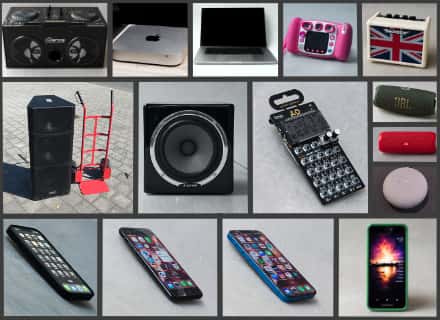
Many new speaker impulse responses have been added to Speakerphone 3. Tiny speakers like the pocket operator mini synth and a digital toy camera and large ones like the QSC KW153 PA Speaker. New phones, computers and portable bluetooth speakers have been added too.

Your choice computer activation or ilok usb key activation

Computer activation

The Speakerphone license can be activated on a computer or on a USB iLok key. The iLok USB key is NO LONGER required.

VST3

VST3 Plug-In

To ensure compatibility with worldclass VST host applications (DAWs) like Ableton Live, Cubase, Nuendo and Digital Performer Speakerphone 3 features a VST3 plug-in.

What did not change in Speakerphone 3

  • Backward compatible. Speakerphone 3 replaces Speakerphone 2. When you open a session/song/project made with Speakerphone 2 (or 1), Speakerphone 3 will open in its place, with the same settings, reading all automation and producing the exact same sound.
    However, sessions/projects/songs saved with Speakerphone 3 will likely not open perfect on Speakerphone 2 workstations.
  • Apart from choosing from the hundreds of presets from the preset browser you can shape and mangle your sound extensively combining the many DSP modules in Speakerphone 3.
  • The 4 GB environment FX sample library you get with Speakerphone remains royalty free to use in any production.
  • With a Speakerphone 3 license you get fixes and support without yearly fees.
  • You have the option to sell your license.

Features

Apart from choosing from the hundreds of presets from the preset browser you can shape and mangle your sound extensively combining the many DSP modules in Speakerphone 3.

Speakerphone 3 user interface showing nice preset with all modules turned ON

Speaker

At the heart of the speaker simulator lies a library of recordings of different speakers, often referred to as Impulse Responses, or IR’s.
When you click a speaker category icon, like the phone or the radio, a browser window appears that lets you select a speaker in that category.
The impulse responses by themselves capture many characteristics, both in frequency and time, of the sampled speaker. The speaker module lets you select a speaker impulse response, and it shows its corresponding photograph. The more info button brings up additional info on the selected speaker impulse response.

Samples

You can build complete environments for the speakers right here, via mouse clicks or MIDI.
Several gigabytes of samples and music are installed with Speakerphone, free for use in your production. 5 tables of twelve samples are accessible at a time for playback via mouse clicks or MIDI.
The samples range from extras like knobs and closing car doors to ambiences and music, and they are used throughout the presets that come with Speakerphone.
You can drag samples from the sample bay to your tracks and vice versa. And you can add your own library as well.

Dry Wet

The Wet Dry control gradually moves between processed and unprocessed (Bypassed) sound in a very elaborate way. A movement from WET to DRY will gradually open up filters, including the speaker IR, and diminish the effects of modules like Distortion and Codec each in a unique way. The overall result of a movement from WET to DRY is a seamless ‘opening’ up of the sound from the complete preset to unprocessed sound. If, for instance, you have your mix sounding from a jukebox in the back of a bar, you can slowly ‘open up’ the sound to full stereo buy dragging the WET/DRY slider. Or click the right most KICK text to make the slider move from wet to dry, automatically, at a speed determined by the speed dial next to the DRY button.

Distortion

Distortion

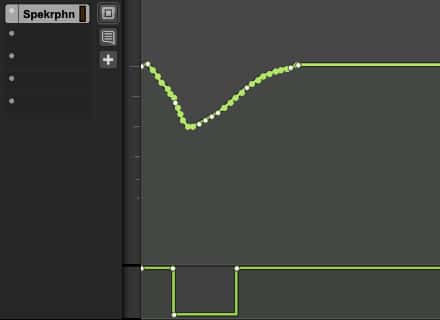
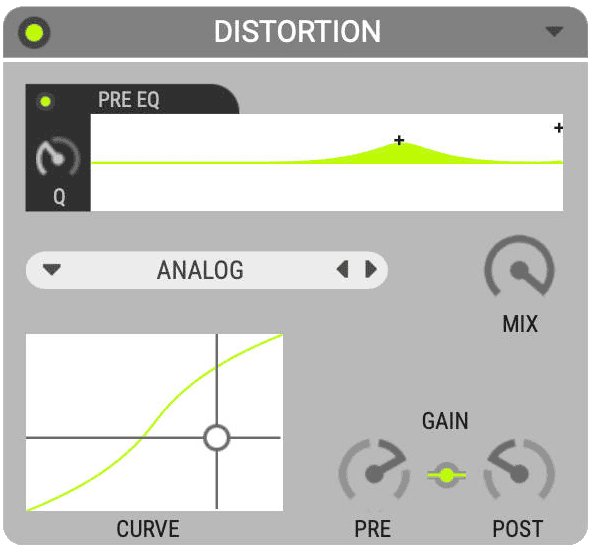
Emulate a speaker's or amplifier's over modulation. In the distortion module audio is first passed through the Pre EQ: a parametric EQ and a low pass filter with resonance. Next, the signal hits the PRE gain, which typically amplifies so the waveform will become more or less distorted in the next module: the Distortion Type: amp models, wave shapers, all of them are further controlled using the CURVE graph at the bottom of the distortion module. POST-gain controls the distortion's output volume. You can also click the connection-button in between PRE and POST to have post gain automatically decrease when pre gain increases and vice versa.

Room

Room

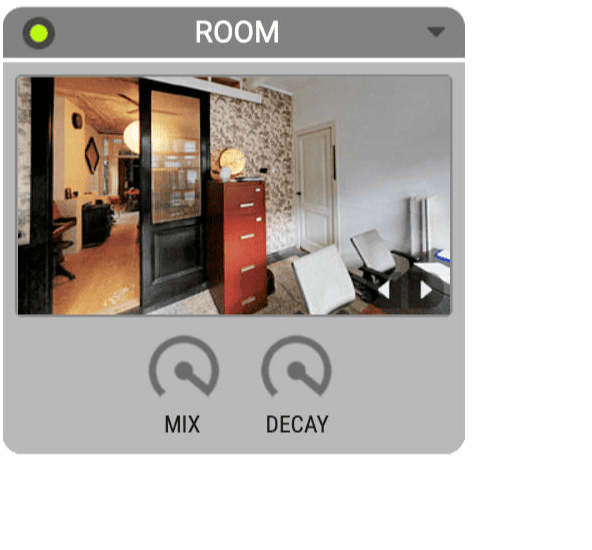
Convolution reverb, powered by Altiverb, for room, outdoor space, hall, resonant enclosure, and reverb gear simulation. Room creates reverb based on recordings of actual spaces ranging from a railway station hall to the cockpit of a MIG fighter plane. Samples of spring and plate reverbs and even real outdoor streets are available as well.

Cover

Cover

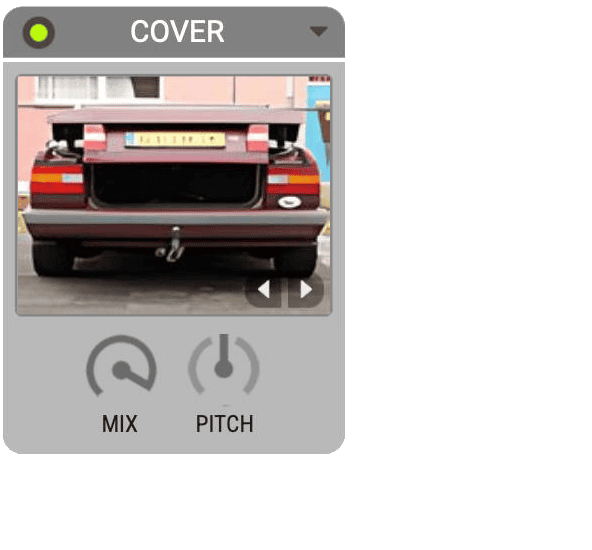
A variety of objects can cover a sound source. Blankets, suitcases, boxes, glass cups, car trunks, walls are just few. The pitch of these resonating little acoustics can be adjusted.

Speakerphone 3 feature Telecom

Telecom

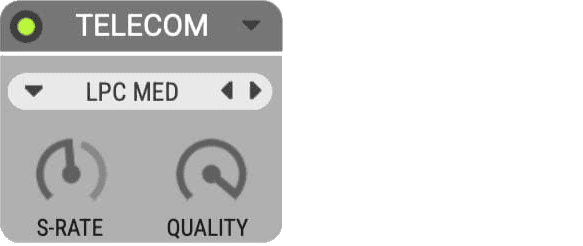
(Cellular) phone connection protocol simulation. Apart from emulating cell phones the codec can be tweaked to make whispering presets, robots and vocal synthesizer effects.

Speakerphone 3 feature Gate

Gate

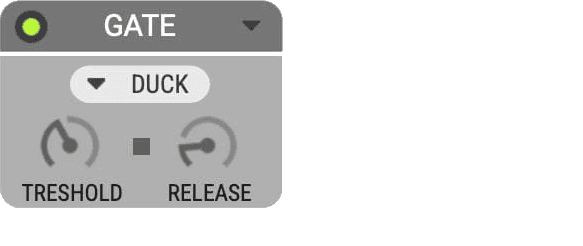
Classic gate, you can set it to duck or entirely mute the input. This can be used to create connections that drop out, to clean up guitar input, etc.

Speakerphone 3 feature Compressor

Compressor

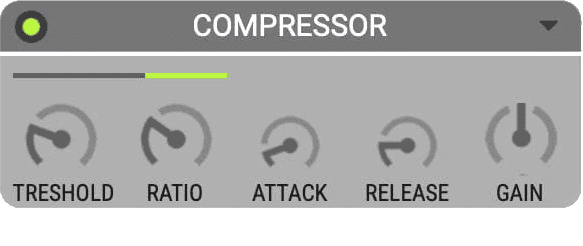
Emulate the pumping of video cameras, enhance the guitar input signal and there are presets for the extreme types of compression that are present in walkie-talkies and megaphones.

Speakerphone 3 feature EQ Equalizer

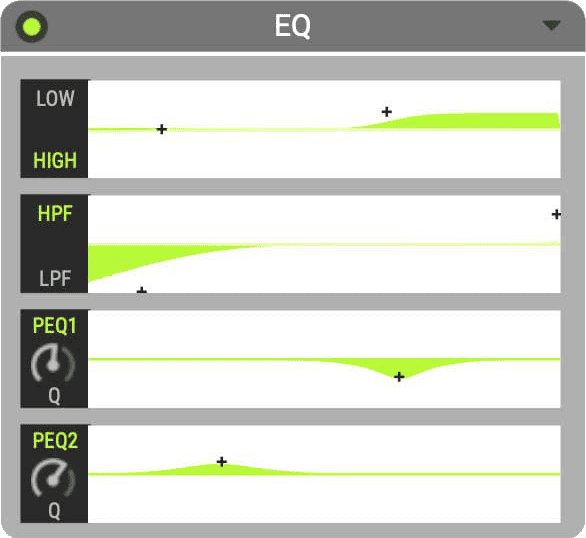
EQ

Five types of frequency filters.
Low and High shelving filters, High pass filter and low pass filter and two bands of parametric equalization with adjustable q-factor.
When adjusting, a popup window appears showing all detailed info on the exact frequency and q you are adjusting.

Speakerphone 3 feature EQ Equalizer popup detail
Speakerphone 3 feature Mod Modulation effects like chorus phaser flanger tremolo and vibrato

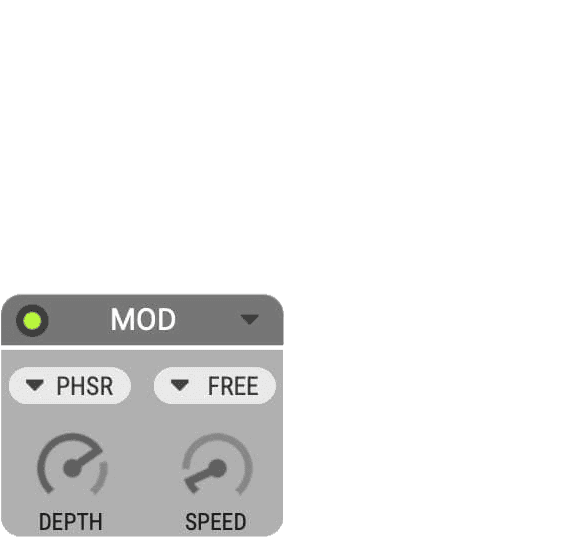
Mod

The modulation (mod) module offers five types of classic modulation effects, available in the top left popup.
These are: Tremolo, Chorus, Phaser, Flanger or Vibrato.
DEPTH controls the amount of the modulation effect.
SPEED controls how fast the modulation oscillates. Speed can either be set in FREE mode or in SYNC mode. SYNC ties speed to the host sequencer's tempo and displays it with a note value.

Speakerphone 3 feature Radio Tuning AM and FM

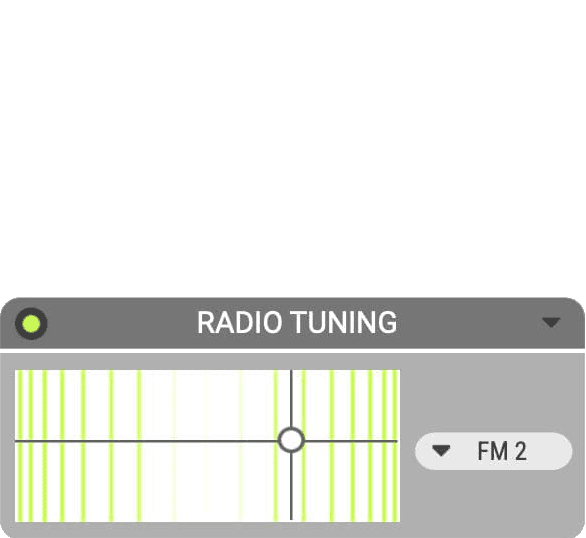
Tuning

Simulates the various effects of a radio receiver dial.
Vertical movement of the cross-hairs changes the frequency of inter-modulation side tones, and when the cross hair is moved out of the horizontal center, the reception of the signal worsens (distortion and noise is added).

Speakerphone 3 feature Mic Micrphone module

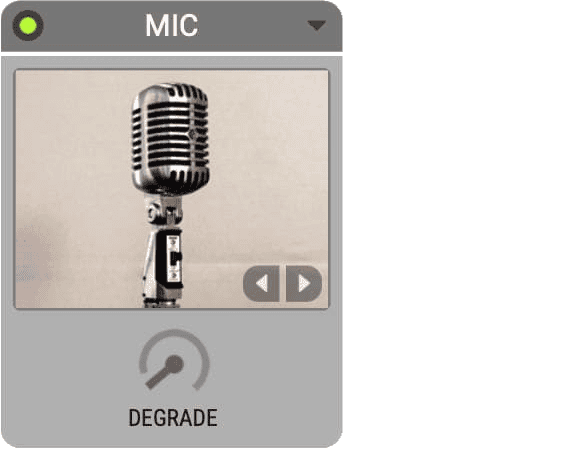
Mic

Similar to the speaker selector, but here a microphone impulse response can be selected. The available microphone time and frequency characteristics of the microphones depicted, and therefore make it sound as if the selected microphone was used in the result. Use it to make an announcer speak through a typical announcer microphone, or to pick up a guitar cabinet using a classic microphone for the purpose, for instance a Royer.

Speakerphone 3 feature Crush bits

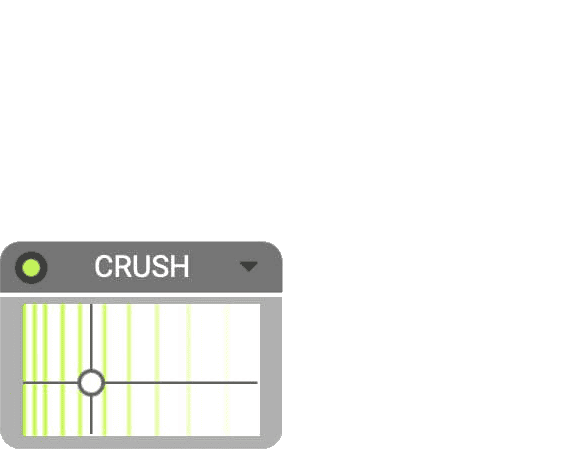
Crush

Word length reduction and sampling rate reduction.
Drag the cross hair down to reduce word length (reduce from 32 bit input to 2 bit output). Move to the left to reduce sampling rate. To maximize aliasing effects the most crude of sample rate conversion algorithms lies beneath the Crush module.

Speakerphone 3 feature Gramophone for Vinyl sound emulation

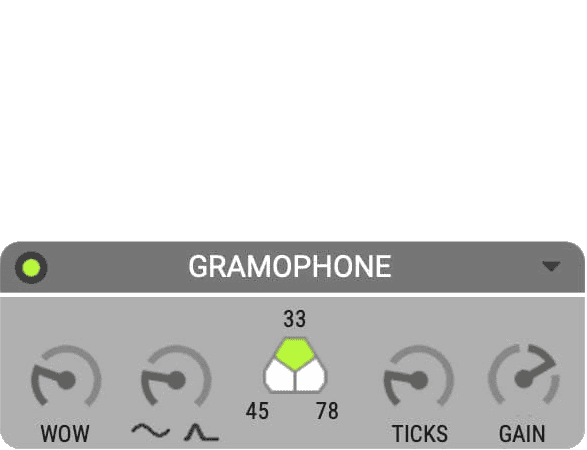
Gramophone

Gramophone effects simulator.
Influence a pitch curve due to 'Wow' (effect of an off-center hole) and Curve (a bumpy vinyl record). Also Add ticks and crackles that knock holes in the input audio.

Speakerphone 3 feature Leslie rotating speaker

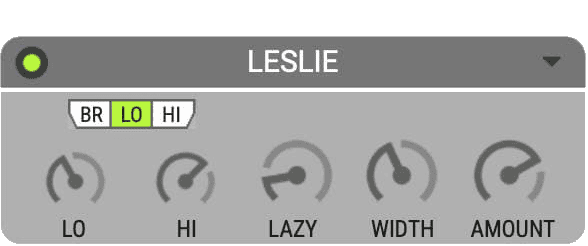
Leslie

This module emulates a Leslie speaker, typically associated with Hammond organs.
A Leslie speaker, on the inside, rotates a horn speaker for the mid to high frequencies, and it rotates a horizontal baffle below a downward facing low frequency woofer. The result is rich rotating sound utilizing the Doppler effect (pitch shifting that can be heard while a sound source moves to or from the listener)

Speakerphone 3 feature Delay creates stereo space

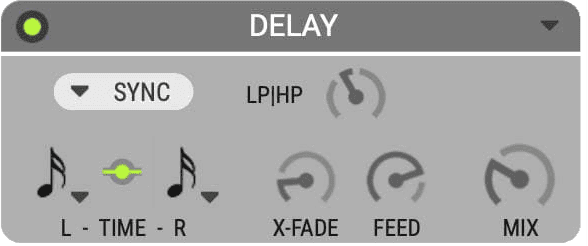
Delay

Mono or stereo feedback delay with a high pass or low pass filter in the feedback loop. The delay can be synced to host tempo, in which case the delay time rotary knobs are exchanged by notes. Clicking on a note then brings up a note-value selector box. The Cross feed parameter determines how much of the left channel signal gets fed into the right channel delay path.

Speakerphone 3 feature LFO to modulate everything bringing patches alive

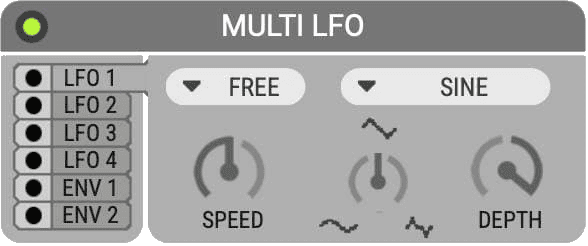
LFO

Four Low Frequency Oscillators (LFO) and two envelope followers (env) for automated parameter control. Simply click and drag a cable to a parameter that you want to control with the LFO. The speed can be synced to the host's tempo and there is a wealth of different waveforms to choose from.

Specifications

System requirements

macOS 10.14 (Mojave) - macOS 15 (Sequoia)
Speakerphone 3 is not available for Windows yet Windows support will be added later. When you purchase Speakerphone 3 now, you will be able to use Speakerphone 2 on Windows.


more information on system requirements

Plug-In formats

AAX Native
Audio Unit (AU, Mac only)
VST3


All plug-ins are 64 bits and have native support for Apple Silicon and Intel cpu types.
Samples
Speakerphone comes with 5 GB environment samples for authentic speaker simulation.

Request link to downloads page

  • Ableton Live 11-12
  • Cubase 11-13
  • Digital Performer 9-11
  • Logic Pro X-11
  • Nuendo 11-13
  • Pro Tools Ultimate/HD Native/LE2018-2024
  • Reaper 6-7

Backward compatible

Speakerphone 3 replaces Speakerphone 2.

When you open a session/song/project made with Speakerphone 2 (or 1), Speakerphone 3 will open in its place, with the same settings, reading all automation and producing the exact same sound.

Not forward compatible: Sessions/projects/songs saved with Speakerphone 3 will likely not open perfect on Speakerphone 2 workstations.

Activation to computer or iLok USB key

Speakerphone 3 can be activated to:
computer or
iLok USB key (2nd generation or newer)
using the iLok License Manager Application.

The iLok USB key is NOT required for Speakerphone 3. iLok cloud activation is currently not supported.

Speakerphone 2 does require the iLok USB key, v2 simply does not work without this.

macOS
macOS 10.14 (Mojave) or higher
including the latest macOS 15 (Sequoia) and macOS 14 (Sonoma).

Latest Speakerphone 3 requires macOS 10.14 Mojave. On earlier macOS version you can use Speakerhone 2.
For Mac OS X 10.11 (El Capitan) or up use Speakerphone 2.2.2
For Mac OS X 10.8.5 - 10.10 Speakerphone 2.1.6 is recommended
For Mac OS X 10.5 to 10.7 Speakerphone 2.0.5 is recommended
Windows
Speakerphone 3 is not available for Windows yet
Windows support will be added later.
For now Speakerphone 2 (v 2.2.2) is recommended on Windows.
Speakerphone 2 works on Windows 7 or up (incl. Windows 11)
Please note v2 does require the iLok USB key for activation.

Speakerphone 2.0.5 also works on Windows XP
Click on a version for release notes ()

Speakerphone 3.0.6 fixes:
fixed a crash when opening sessions / inserting the plug-in Using Rosetta or on Intel macs.
 
v3.0.5 fixed a crash in the Speakerphone 3 AU (AudioUnit) Plug-In in some DAWs (Digital Performer, Luna, Audacity, Ableton Live, Reaper)
 
New in Speakerphone 3 for macOS:
Improved automation reliability
Native Apple silicon support
New resizable interface
New outdoor & car IRs
New input level meter
New Speaker IRs
Computer activation (no more ilok USB key required)
VST3 Plug-In
Windows support will be added later
Speakerphone 3.0.5 fixes:
fixed crash in the Speakerphone 3 AU (AudioUnit) Plug-In in some DAWs (Digital Performer, Luna, Audacity, Ableton Live, Reaper)
 
New in Speakerphone 3 for macOS:
Improved automation reliability
Native Apple silicon support
New resizable interface
New outdoor & car IRs
New input level meter
New Speaker IRs
Computer activation (no more ilok USB key required)
VST3 Plug-In
Windows support will be added later
New in Speakerphone 3 for macOS:
Improved automation reliability
Native Apple silicon support
New resizable interface
New outdoor & car IRs
New input level meter
New Speaker IRs
Computer activation (no more ilok USB key required)
VST3 Plug-In
Windows support will be added later

Speakerphone 2.2.2 update for macOS release notes:
AAX latency reporting corrected
Speakerphone 2.2.2 update for Windows release notes:
Blank screen in mic/cover/room solved
no more logging in audio thread
VST & AAX latency reporting corrected
VST & AAX plug-ins are 64 bits only (version 2.1.6 is the last Speakerphone 2 in 32 bits).
VST: Nuendo & Cubase: IR automatisation fixed
VST: crash when inserted in multichannel channel is solved
Pro Toos: fixed crashes on HDX hardware
Speakerphone 2.2.1 update for macOS release notes:
Blanc screen in mic/cover/room solved
Audiounit & VST: latency is reported correctly
Mac: User Presets are now stored in /Users/Shared/Audio Ease/Speakerphone
VST: crash when inserted in multichannel channel is solved
Speakerphone 2.2.0 update for macOS release notes:
Pro Toos: fixed crashes on HDX hardware
Speakerphone 2.1.9 update for macOS release notes:
installer improvements
VST & Audio Unit (AU) latency reporting corrected
Speakerphone 2.1.8 update for macOS release notes:
New installer to ensure compatibility with macOS 12 (Monterey)
macOS 64 bits only (version 2.1.6 is the last Speakerphone 2 in 32 bits).
minimal macOS version is now 10.11, on previous macOS versions 2.1.6 can be used.
VST: Nuendo & Cubase: IR automatisation fixed
Windows and popup menus are transparent again on macOS
no more logging in audio thread
Speakerphone 2.1.6 update release notes:
Speakerphone now checks for a new version (at audioease.com) by using https.
Speakerphone 2.1.5 update release notes:
Compatible with Windows 10
Version checking online is allowed again
Audiounit: older sessions are loaded again
Audiounit: latency is reported correctly
fixed an issue for sessions at 96kHz
some VST improvements
Speakerphone 2.1.4 update release notes:
runs in Pro Tools 10.3.10
compatibility issues with Digital Performer 8 fixed
compatibility issues with Cubase 8 & Nuendo 7 fixed
mac: Installer is signed
mac: Installer removes old .dpm plugin
Samplebay drag and drop is possible again
Samplebay Loops play properly
more improvements to sample player
mouse rollover in sample bay works again
midi works in Logic
Audio Suite has bypass button
Audio Suite crash solved
win: Solved a few UI problems
a new sample folder can be selected
several smaller issue were solved
"Mute on stop" problem fixed
Enhancements in operability on consoles, S6 in particular
Cover-pitch issue with audiosuite fixed
Speakerphone 2.1.3 update for Windows release notes:
See Mac 2.1.1 notes below for what is new in 2.1
This update adds 64 bits support to Speakerphone 2 on Windws (including AAX).
And like on Mac, Speakeprhone 2.1 on Windows now requires the iLok 2 key.
Speakerphone 2.1.2 update Mac only release notes:
installer fix
Speakerphone 2.1.1 update Mac only release notes:
This update is fully backward compatible with Speakerphone 2 (and 1).
It reads the presets, settings and automation and sounds the same.
New features:
64 bits
AAX (does require Pro Tools 10.3.8 or up)
New smartphone, tablet and flatscreen TV speaker IRs added !
New preset browser
Factory presets also in host format
Retina display support
Please note:
Mac only, Windows support is in the works, but not ready yet
Speakerphone 2.1 requires the iLok 2 key

Speakerphone 2.0.5 update release notes:
New music samples
Speakerphone 2.0.4 update release notes:
Mac OS X Lion compatibility issues fixed
PC: saving presets works
Fixed: clicking problem when playing some wave files in the sample bay
Fixed: Some parameters are not available in automation
Speakerphone 2.0.3 update Windows only release notes:
The Speakerphone 2.0.3 PC update benefits from the same fixes as the Mac version that was released last week (see below), plus:
[Audiosuite] no more accesviolation erros
PC Installer does not remove user files anymore
Speakerphone 2.0.3 update Mac only release notes:
When "Mute on Stop" is on, the telecom module also mutes
Bypass not saved anymore in Automation Presets
[AU] Midi works now
[AU] in Logic: Plugin windows sticks to its frame now
[Live] Presets window floats on top of the plugin window
[VST] offline processing window can access presets window
Avid Media Composer compatibility
[Cubase 5] sample bay works again
[PT] choosing a Pro Tools presets writes automation
[PT] Compare works again
[PT] adjustments of automation data is correct now
[Audiosuite] no remaining of previous preview in rendered audio
Speakerphone 2.0.2 update release notes:
[vst] Better parameter names in automation
[all] Compatibility with Speakerphone 1 has improved
[installer] Fixed an installer folder privilege problem
[au] Fixed crash in Digital Performer Auval
Speakerphone 2.0.1 update release notes:
Importing SP1 settings in Nuendo & Cubase works correctly now
Fixed bug in preset browser: a single click opens the user section.
Importing Speaker & Room IR Automation data works correctly now*
* a speaker selection bug in Speakerphone 2.0.0 prevented some Speakerphone 1 sessions to come up with the wrong speaker selected. The bug is fixed, but the consequence is that sessions made with speakerphone 2 may load with the incorrect speaker selected, so please double check which speaker is selected in the speaker module.
Speakerphone 2.0.0 update release notes:
World"s first Speakerphone 2 release

Speakerphone 1.1.3 update release notes:
Solves a muting problem introduced by the 1.1.2 update.
Speakerphone 1.1.2 update release notes:
Solves a graphics problem in the Speakerphone 1 interface that occurs in Pro Tools 8 in Mac OS X 10.5 when you use a control surface.
Speakerphone 1.1.1 update Windows only release notes:
This release benefits from the same fixes mentioned in last weeks Speakerphone's 1.1.1 Mac update release notes.
Speakerphone 1.1.1 update Mac only release notes:
Preferences get saved now when not logged in as administrator user
Audio Unit compatible with Sound Track Pro
fixed problems with Mute when stopped in VST
improved on resizing window
improved on popup menus in VST
fixed problem in Codec
overall stability improved
Speakerphone 1.1.0 update Windows only release notes:
This release benefits from the same new features and fixes mentioned in the 1.1.0 Mac version plus it fixes:
compatibility with Sound Forge improved
compatibility control surfaces for Pro Tools improved
fixed right mouse click behavior
Speakerphone 1.1.0 update Mac only release notes:
automation of Speaker IR & Room IR
compatible with latest Pro Tools & Max OS X 10.5 (Leopard
added possibility to turn off auto update checking
low sample rates work correct
name of saved preset comes back
compatibility with Digital Performer Improved
compatibility with Ableton Live improved
fixed some automation issues
fixed some "mute when stopped" problems
Speakerphone 1.0.3 update Windows only release notes:
This release benefits from the same fixes mentioned in the 1.0.3 Mac version
Speakerphone 1.0.3 update Mac only release notes:
preset change faster then ever before!
drag and drop now works without having to hold down any modifier keys
drag and drop from/to Cubase/Nuendo fixed
[AU] can be used with 10.3.9
[VST] Inserts the correct channel IO variant again
Speakerphone 1.0.2 update release notes:
[AU] improved on latency in AudioUnit
[AU] fixed compatibility issues with Logic 8
[VST PC] fixed disappearing interface on vst pc
fixed compatibility issues with Live
[VST PC] fixed some other issues with vst version on pc
removed crashing bug with sample bay
removed crashing bug with menus
fixed several smaller and bigger issues
Speakerphone 1.0.1 update release notes:
fixed dry/wet slider
numerous fixes and improvements on automation
previous/next ir works correct now
[PT] support for control surfaces
[PT] bypass available for automation
[VST mac] improved on vst interface
[VST mac] offline editing works now
[PC] compatible with 16 bits color
numerous smaller bug fixes
Speakerphone 1.0.0 update release notes:
First Speakerphone release ever
Connect with us
and stay up to date

Guided tour

Sit down and take this amazing trip with Arjen showing you around in Speakerphone 3.

Download

Download Speakerphone.
For registered users only.

F A Q !

Answers to your questions, background information, see the faq below.

PDF Manual

Search and find what you need to know in the Speakerphone 3 pdf manual.

LISTEN !

Listen to speakerphone plug-in presets applied on a studio recording.

System requirements

Check if the Speakerphone plug-in will run on your system.

Change/update registration

Change or update your registered email address at audioease.com

EULA

Check the Speakerphone 3 end user license agreement.

Need more help?

Give us a call or send us an email and we will get back to you as soon as possible!


+31 30 244 6335

SUPPORT HOURS
MONDAY-FRIDAY 9AM-5PM CET

LOCAL TIME @AudioEase
MONDAY 7:52 PM

Frequently asked questions

Installation

Welcome to Altiverb 7 !

Install iLok software
First please make sure you have installed the latest ilok software from:
www.ilok.com
When you do not have an ilok.com account, please create one for free at ilok.com.

Get the Altiverb 7 license
If you do not have the Altiverb 7 license on your ilok account yet, you can request it here:
www.audioease.com/authorization

Then run the ilok license manager app, log in to your account and choose to activate the Altiverb 7 license to your iLok (2nd generation or up) key. Once you did this you can install and use Altiverb 7 on any Mac or PC you connect this ilok key to.

Request an Altiverb 7 downloads email
To get the latest Altiverb 7 installer, please request a link to the current downloads page at:
www.audioease.com/download

Full install
Check your email, open the downloads page from the link in the email and then proceed to download the latest first time full Altiverb 7 installer (that is the large 7 GB download, not the plug-in updater).

Extract the zip file with the OS default tool (macOS: Archive Utility, Windows: choose Extract All...) and then run the Altiverb 7 installer to install Altiverb 7.
The installer will ask you where to install the impulse responses and what plug-ins to install (or at what locations, on Windows) and it will then proceed to install Altiverb 7 and all impulse responses.

Then open your DAW and you will find Altiverb 7 is available as effect ready to add reverb to your audio.
Update to latest version 7
To update an installed Altiverb 7 to the latest simply request a link to the downloads page and download the latest plug-in updater. The update installer will take care of updating, no need to uninstall or anything.
www.audioease.com/download

Update old 7 to the latest 7
When you are updating a really old Altiverb 7 installation to the latest you can best download the latest first time full Altiverb 7 installer (not the updater) to make sure the impulse responses (IRs) get updated to. The Altiverb 7 impulse responses core library gets updated every few years and if you update from an old Altiverb 7 it is required to re-install the latest complete IR set.

New impulse responses (IRs)
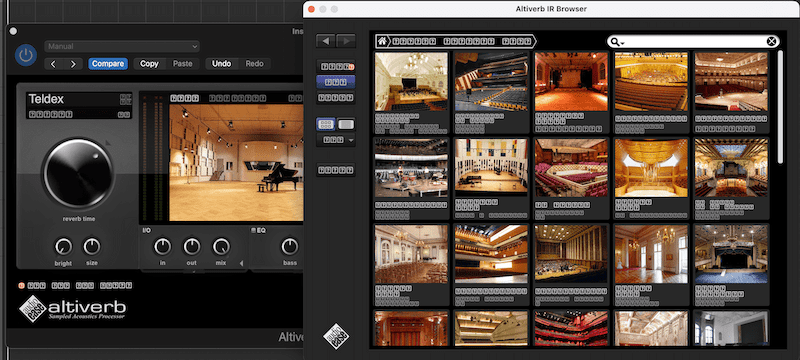
We are continuously looking for, traveling to and recording the nicest acoustics from all around the world. We add new IRs to the Altiverb collection regularly and to install these simply open the IR Browser in Altiverb 7, hit the NEWS button and Altiverb will show you what IRs are available for download. And a single click on the download button is enough to add the IR to your collection.

Upgrade old Altiverb to version 7
You can upgrade an old Altiverb version (version 1, 2, 3, 4, 5 or 6) to version 7. Check your options at:
www.audioease.com/store/#upgrade
Follow this guide to remove Altiverb 7 from your system. Please note you do not need to uninstall when updating Altiverb 7. The installers will take care of this.

Windows
Simply uninstall Altiverb 7 via the add/remove software Control Panel.

macOS
To uninstall Altiverb 7 on Mac OS X please delete the Altiverb 7 plug-ins from here:
Audio Unit:/Library/Audio/Plug-Ins/Components/
MAS:/Library/Audio/Plug-Ins/MAS/
VST:/Library/Audio/Plug-Ins/VST/
AAX:/Library/Application Support/Avid/Audio/Plug-Ins/
RTAS:/Library/Application Support/Digidesign/Plug-Ins/
Then remove the following folders:
/Applications/Audio Ease/Altiverb 7
/Users/Shared/Altiverb

And the Altiverb 7 preferences file:
/Users/name/Library/Preferences/com.audioease.suite.Altiverb7.plist *

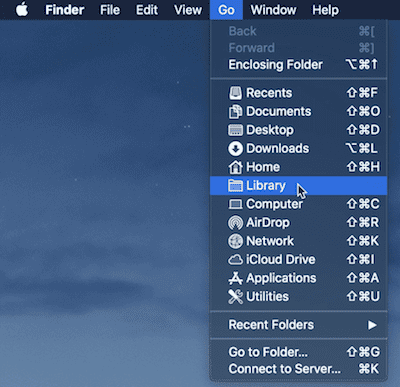
* Please note Mac OS X hides the Library folder in your user folder (since 10.7). You can go there by hitting the GO menu item in the menu bar when you have a finder window open. Then hold down the option (alt) key and a link to the User Library will appear.
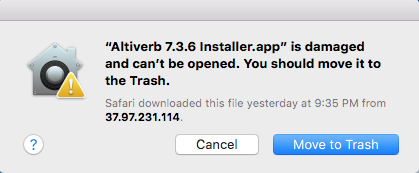
av7 installer damaged
Here's what you can do when the newly downloaded installer fails to run because the macOS reports the downloaded installer failing verification (or reports it is damaged and cannot be opened).
  1. Make sure you use the macOS default 'Archive Utility' to open the downloaded zip file (other utilities could corrupt the installer app while unpacking the zip file).
  2. Please check if there is a security update available for your macOS and please install this.
  3. Open Safari and check if you can visit https://www.audioease.com.
    When you can visit the website in Safari, then please retry downloading the installer. If the download fails to run, you can try using a different browser. Any of the following: Firefox, Opera, Chrome, Safari, will do.
Perhaps the download is broken, in which case a new download with another browser may work. Otherwise the solution may be to use Terminal, a built-in program on the Mac.
  1. Make sure you use the macOS default 'Archive Utility' to open the downloaded zip file (other utilities could corrupt the installer app while unpacking the zip file).
  2. In case that does not solve it, open Terminal. You can use the Mac search at the top right and start typing Terminal. It will appear, click on it to open the program.
  3. Type “unzip” and a space, then drag/drop the zip file into the Terminal window.
  4. Press Enter and the zip file will be unzipped, storing all files on your computer.
Did you loose track of the screen saver? The plug-in should offer to install it, but you can also download the screen saver and copy it to:/Library/ScreenSavers/

Download Altiverb screensaver
Welcome to Speakerphone 2 !

Install iLok software
First please make sure you have installed the latest ilok software from:
www.ilok.com

Get the Speakerphone 2 license
If you do not have the Speakerphone 2 license on your ilok account yet, you can request it here:
www.audioease.com/authorization

Then run the ilok license manager app, log in to your account and choose to activate the Speakerphone 2 license to your iLok (2nd generation or up) key. Once you did this you can install and use Speakerphone 2 on any Mac or PC you connect this ilok key to.

Request a Speakerphone 2 downloads email
To get the latest Speakerphone 2 installer, please request a link to the current downloads page at:
www.audioease.com/download

Full install
Check your email, open the downloads page from the link in the email and then proceed to download the latest first time full Speakerphone 2 installer (a large 4.5 GB download, not the plug-in updater).

Extract the zip file with the OS default tool (macOS: Archive Utility, Windows: choose Extract All...) and then run the Speakerphone 2 installer to install Speakerphone 2 and all samples. The installer will ask you where to install the samples and what plug-ins to install (or at what locations, on Windows) and it will then proceed to install Speakerphone 2 and all samples.

Then open your DAW and you will find Speakerphone 2 is available as effect ready to worldize (futz!) your audio.
Update to latest version 2
To update an installed Speakerphone to the latest version simply request a link to the downloads page and download the latest plug-in updater. The update installer will take care of updating, no need to uninstall or anything. www.audioease.com/download
Follow this guide to remove Speakerphone 2 from your system. Please note you do not need to uninstall when updating Speakerphone 2. The installers will take care of this.

Windows
Simply uninstall Speakerphone 2 via the add/remove software Control Panel.

macOS
To uninstall ASpeakerphone 2 on Mac OS X please delete the Speakerphone plug-ins from here:
Audio Unit:/Library/Audio/Plug-Ins/Components/
MAS:/Library/Audio/Plug-Ins/MAS/
VST:/Library/Audio/Plug-Ins/VST/
AAX:/Library/Application Support/Avid/Audio/Plug-Ins/
RTAS:/Library/Application Support/Digidesign/Plug-Ins/
Then remove these folders:
/Applications/Audio Ease/Speakerphone
/Library Application Support/Audio Ease/Speakerphone
/Library/Frameworks/SpeakerPhonePublicSupport.framework


And the Speakerphone 2 preferences file:
/Users/name/Library/Preferences/com.audioease.suite.Speakerphone2.plist *

* Please note Mac OS X hides the Library folder in your user folder (since 10.7). You can go there by hitting the GO menu item in the menu bar when you have a finder window open. Then hold down the option (alt) key and a link to the User Library will appear.

License activation

If you have just purchased an Audio Ease product and received a serial number you can register this here:
www.audioease.com/ed

Why register?
When registered you can access the downloads and immediately get licenses to activate the software.

When you have purchased your software directly at audioease.com there is no serial number. In this situation you can get your licenses directly at:
www.audioease.com/authorization
If you have just purchased at audioease.com or registered a serial number you can immediately get an iLok license for your product.

Simply go here: www.audioease.com/authorization
fill in your registered email address and proceed.
In case your iLok key is lost, stolen or broken we will help you out right away, even in case you have not invested in additional insurances or coverage at ilok.com.

Send a message to support@audioease.com and we will provide you with a 30 days expiring backup license so you can continue your work immediately. A spare iLok USB key is required for this, as the software (Altiverb, Speakerphone and Indoor) requires the ilok usb key. This means the software will not work without an ilok usb key with a license on it.

To resolve this situation permanently you may have to acquire another iLok USB key. We can help here too:
We can send you one at a not-for-our-profit-price, which will normally takes 2-6 weekdays in Europe (6-20 weekdays to the rest of the world), available at: audioease.com/store. Depending on your location purchasing locally might be quicker.
Yes, you can sell / transfer your license to another user.

You can transfer a license from your ilok account to someone else's ilok account (the new owner) by using the iLok License Manager (choose Transfer License...).
Please note: while PACE/ iLok fees apply, there are no fees imposed by Audio Ease.

Do please send a message to support@audioease.com with the name, email address and ilok user account info of both you and the new owner.

We will then transfer the software registration at audioease.com to the new owner, so that they will be able to access all downloads and (future) upgrades.
You can use the software with a single license on more then one computer. Simply connect the ilok usb key with the license on it to a computer and you can install and use the software.

However you can use the software only at one computer at a time.

When you need to run the software in two locations (two rooms / two machines) at the same time this requires two licenses. This means purchasing two copies of the software. We do not offer any second license deals or discounts.

General troubleshooting

Altiverb 8, Speakerphone 3 & Indoor 2 are universal (native Apple silicon and Intel)

360pan suite 3 works fine using Rosetta 2 on the Apple silicon machines. The performance is great.

The latest BarbaBatch, Snapper and Make a Test Tone are all universal applications, supporting both Apple silicon & Intel.

Last update: Dec 6, 2024
In case your iLok key is lost, stolen or broken we will help you out right away, even in case you have not invested in additional insurances or coverage at ilok.com.

Send a message to support@audioease.com and we will provide you with a 30 days expiring backup license so you can continue your work immediately when you have a spare ilok key.

To resolve this situation permanently you may have to acquire another iLok key. We can help here too:
We can send you one at a not-for-our-profit-price, which will normally takes 2 to 5 shipping days in Europe (6-20 days to the rest of the world), available at: audioease.com/store. Depending on your location purchasing locally might be quicker.
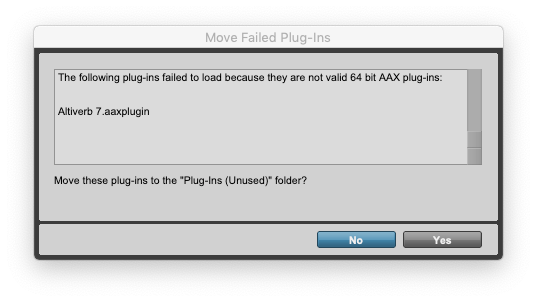
Pro Tools states it is not a valid 64 bits plug-ins
Most likely the installer or the plug-in got corrupted in transit. Please download the latest updater installer on the computer you want to use it on. Then move the downloaded zip file on the desktop and there choose to extract it using the Mac OS X default Archive Utility app. Once you did this please run the updater installer from the desktop to install the correct aaxplugin and this should cure the problem.
The aax plug-in can get corrupted when transferred on some external (or network) drives. The plug-in won't validate properly then.
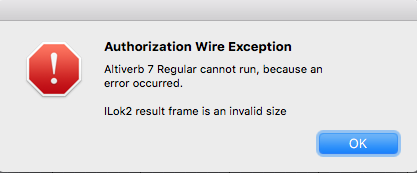
Authorization Wire Exception bad channel id "Speakerphone / Altiverb cannot run, because an error occurred. Encrypted Channel Bad Channel ID (or USB error or frame is an invalid size)"
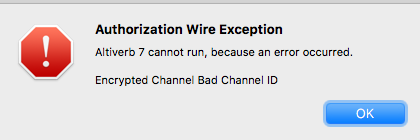
Authorization Wire Exception invalid size

Errors like these can be solved by downloading and installing the latest ilok software from www.ilok.com. Altiverb, Speakerphone, Indoor and 360pan suite require this software.
Windows Authorization Error: Altiverb 7 Regular cannot run because it is corrupted please try reinstalling the product

This error means the graphics card driver on your system is not up to date. Even when Windows states this is up to date, Altiverb 7 can generate this error and you will find there is a newer driver available (and this will solve this error).

Please try to update your graphics card driver.

Find out what graphics card you have in your system (right click on your desktop, choose change screen resolution, hit advanced settings, that would show you the manufacturer"s name and the model).
Then please go to the manufacturer"s website, hit support/drivers and find the latest driver for your graphics card and download and install this.
Restart your computer.
The problem should be gone now.
The plug-in is installed correctly (Altiverb / Speakerphone / Indoor / 360pan suite) and the ilok software is up to date and still the plug-in cannot be found in Cubase (or Nuendo).

Let's clear Clear the Cubase vst preferences to force a re-scan of all vst plug-ins (in case the plug-in is blacklisted)

  • Remove all plist/xml files with VST in the file name from the Cubase preferences folder, check this post where to find the preferences folder.
  • Then restart your computer.
  • After the restart run Cubase. Cubase will now re-scan all plug-ins and it should load the plug-in again.

360pan suite

Currently the 360pan suite cannot detect the video window in Pro Tools 2023 & up on Windows. Until this has been resolved in an update we advice to stay on Pro Tools 2022 for 360pan suite on Windows.
When using HDX hardware the Hybrid Engine needs to be Enabled for the private (pre-fader) sends from the 360pan plug-in to the 360reverb to work.
When the Hybrid Engine is disabled the distance cannot be controlled for a panned source. The 360reverb does work as normal reverb insert/aux effect on HDX systems with disabled Hybrid Engine.
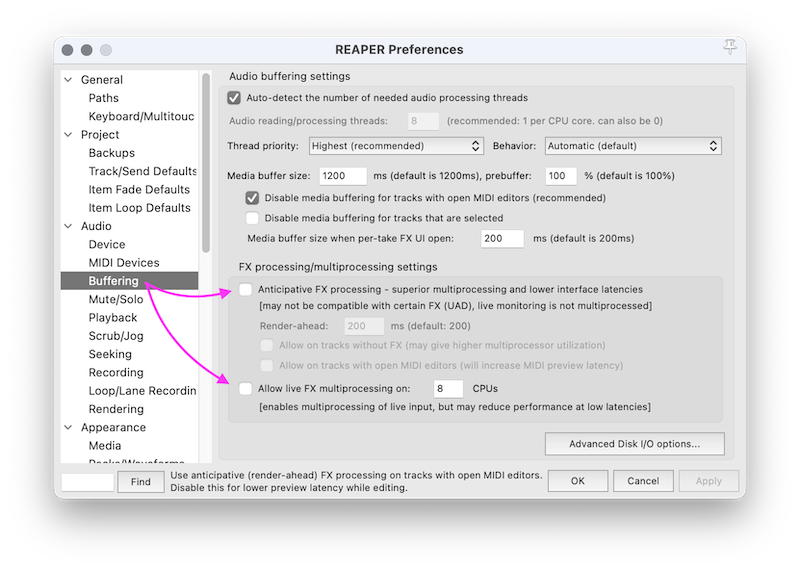
When you use the VST3 360pan suite plug-ins in Reaper you will have to verify two settings in Reaper's preferences are properly set up, else the suite will not function properly.

In Reaper choose Preferences... from the bottom of the Options menu and then first go to:

Reaper preferences - turn off Anticipative FX Processing 1. Audio -> Buffering
and then TURN OFF the Anticipative FX Processing
2. Audio -> Buffering
and then TURN OFF the Live FX multiprocessing
these two options will ensure the 360reverb to function properly (else you will get sync problems)

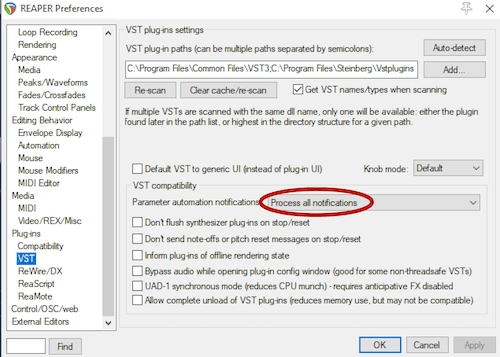
Reaper preferences - VST-parameter-automation
3. Plug-Ins -> VST
Under VST Compatibility please set the Parameter automation notification to:
Process all notifications
this will ensure automation is written to track when you control the panner pucks from the video overlay (without the panner plug-ins being open).

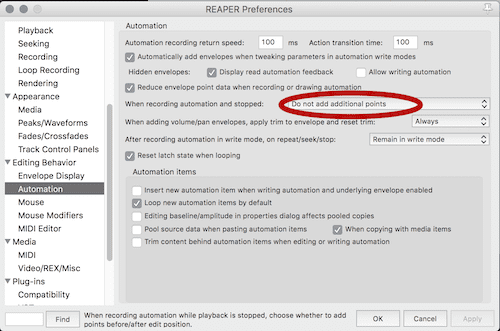
Reaper preferences - automation-do-not-add-points.png
4. Editing Behavior -> Automation
When recording automation and stopped should be set to: Do not add additional points.
This to ensure you can nudge the time cursor and then drag pucks and write automation this way (like in the tutorial/example project).
5. Reverb last
When creating a bus for 360Reverb, make sure it is last, or right before the monitor.
6. Your Video window can not be Docked, and the video window can not be full screen.
These are not in the settings window. You right-click on your video to undock it if it is embedded in another window.
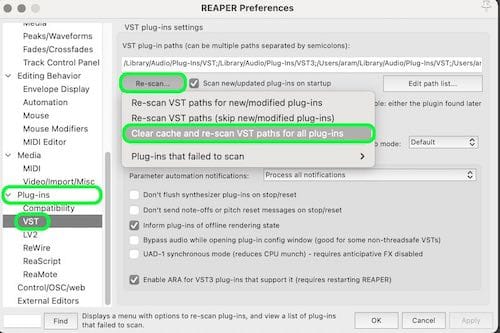
It could be some or all 360pan suite plug-ins are missing the first time you run Reaper after installing the 360pan suite VST3 plug-in. Reaper then needs a gentle push to see all plug-ins in the suite.

Solution:In Reaper choose Preferences... from the bottom of the Options menu and then open the VST tab in Plug-Ins:
  • Hit the Re-scan... button
  • Choose (from the popup menu) Clear cache and re-scan VST paths for all plug-ins
  • Quit and restart the Reaper app
Reaper preferences - Clear Cache and rescan to make the plug-ins appear

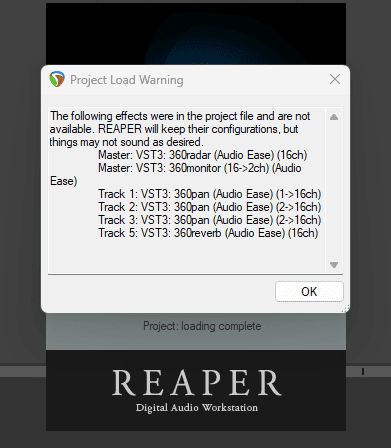
Clearing the cache should solve warnings like this:
In Reaper not all plug-ins available
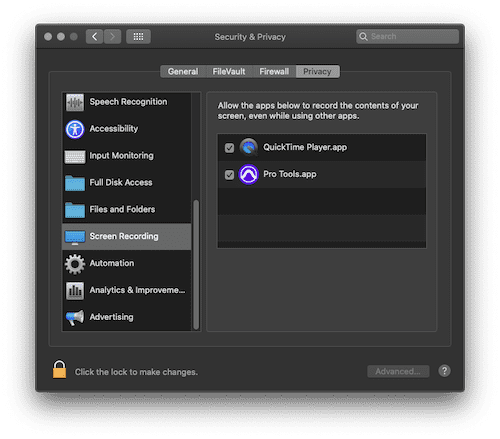
The video preview in the 360monitor AAX plug-in only functions (on modern systems and recent Pro Tools versions) when the Pro Tools.app is allowed to record the computer screen in the macOS system preferences.
Make sure you set this option to fully benefit from the 360pan suite plug-ins options.

360monitor video preview: Allow Screen Recording for Pro Tools
Quick start: download & check out the example project / session featuring a short 360 video of us running around at Audio Ease, mono panning audio, a true ambisonics (b-format) FX recording, binaural preview and export suggestions.

Open the practice project START and open the workflow video and practice along with the video.

Available for Pro Tools, Reaper and Nuendo at:
www.audioease.com/360/#example
Here we offer a bunch of free "spatial treats" that we use at Audio Ease ourselves on a daily basis. There are no warranties, and almost all of it builds upon either Google's Omnitone or Here we offer a bunch of free "spatial treats" that we use at Audio Ease ourselves on a daily basis. There are no warranties, and almost all of it builds upon either Google's Omnitone or FFMPEG:
www.audioease.com/360/#goodies
True headlocked stereo is not possible in the ambisonics audio format.
Ambisonics audio is a 3D audio sphere and headlocked (fixed) stereo sound does not fit into this.
This is simply impossible.

Headlocked mono is possible, that is the top channel only.

360pan suite offer to mix to the top channel using the position blur control.
More position blur (more mix to top) is more mono, more inhead/headlocked.
When you pan your stereo source hard left and right (-90 and +90) in the ambisonics sphere and you set the position blur to half way (somewhere between 0.40-0.60) you will find there is stereo sensation while you cannot really identify things turning when you look around in the 3D sphere.
If you move the position blur control more towards 1 you will find it will rotate less, but it will also be more mono. That is the trade off.

Altiverb 8

Do you have customer IRs, or did you add your own IRs, impulse responses, to Altiverb 7?
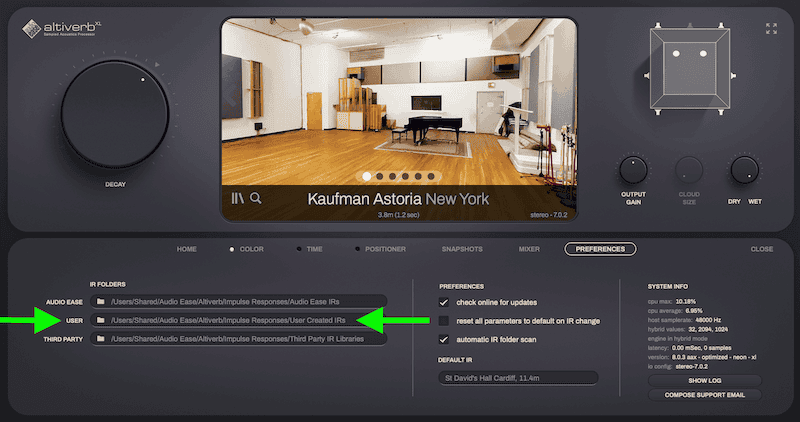
You have to copy these to the new location Altiverb 8 uses to ensure Altiverb 8 also finds these.
The new location is:
/Users/Shared/Audio Ease/Altiverb/Impulse Responses/User Created IRs

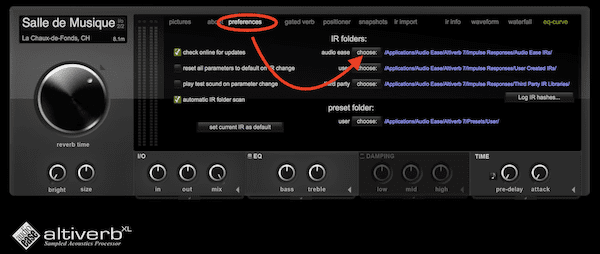
You can also verify Altiverb 8 uses this location, in the preferences tab in the plug-in:
Altiverb 8 user irs prefs
Altiverb 8 is backwards compatible with Altiverb 7. when you install the upgrade license replaces your altiverb 7 license, and the Altiverb 8 plug-in will be loaded in your older sessions, sounding identical to Altiverb 7 (and Altiverb 6 and Altiverb 5).

Forward compatibility is limited: sessions made with Altiverb 8 don’t load reliably on systems with altiverb 7 installed because new functions may have been used in the Altiverb 8 session that are lacking in Altiverb 7.


Problem: Altiverb 8 XL is installed, however Altiverb 8 is only available in mono and stereo (no surround or multi-channel options).
Or opening sessions made with Altiverb XL results in inactive plug-ins.

This could be due to incorrect plug-in cache in Pro Tools.

Solution: Force a re-scan of the plug-in.
First make sure Pro Tools is Quit. Then please remove these files: /Users/Shared/Pro Tools/AAXPlugInCache/Altiverb 7.aaxplugin.plugincache
/Users/Shared/Pro Tools/AAXPlugInCache/Altiverb 8.aaxplugin.plugincache


Now open Pro Tools. Pro Tools should re-scan the Altiverb plug-in and it should discover the XL multi-channel surround options now.
There will be no MAS Altiverb 8 plug-in.
Before you upgrade to Altiverb 8 please save the settings of your MAS Altiverb 7 plug-in instances in your projects as Altiverb presets (irp files). You can do this in the Altiverb IR browser.
These will be converted by the Altiverb 8 installer so you can load your settings into your Altiverb 8 Audio Unit instances when you replace them. In case in a while you need to turn back to an old project where you have not done that we can provide temporary licenses so you can do this still.

You can also use this handy preset converter app to convert old presets to the new one.
Download Preset Converter app
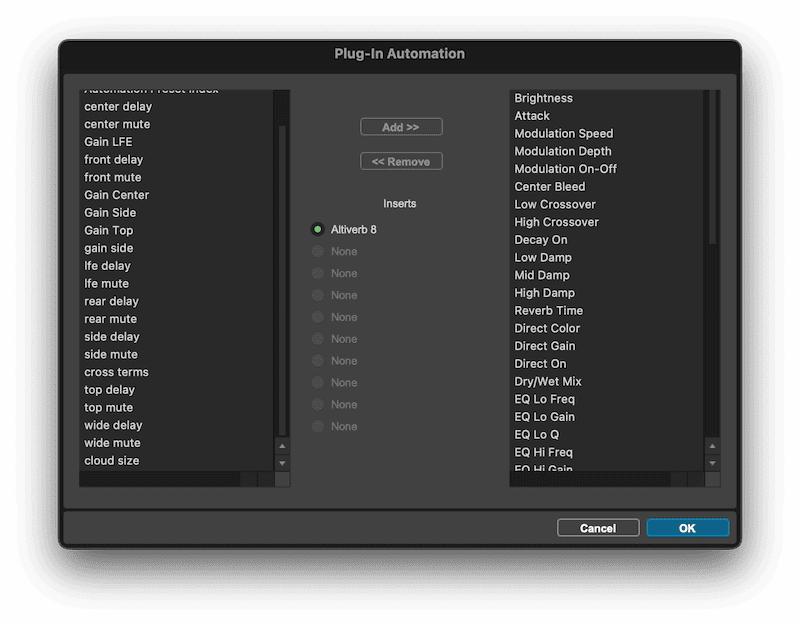
All new parameters in Altiverb 8 are not automatically enabled for automation when you open a session that was started with Altiverb 7. Ensure to enable these if you rely on automation.

Of course when you insert a new Altiverb 8 instance all parameters do get enabled directly (if you have this enabled in the pro tools preferences).
Enable new paramters for automation in Pro Tools

Speakerphone

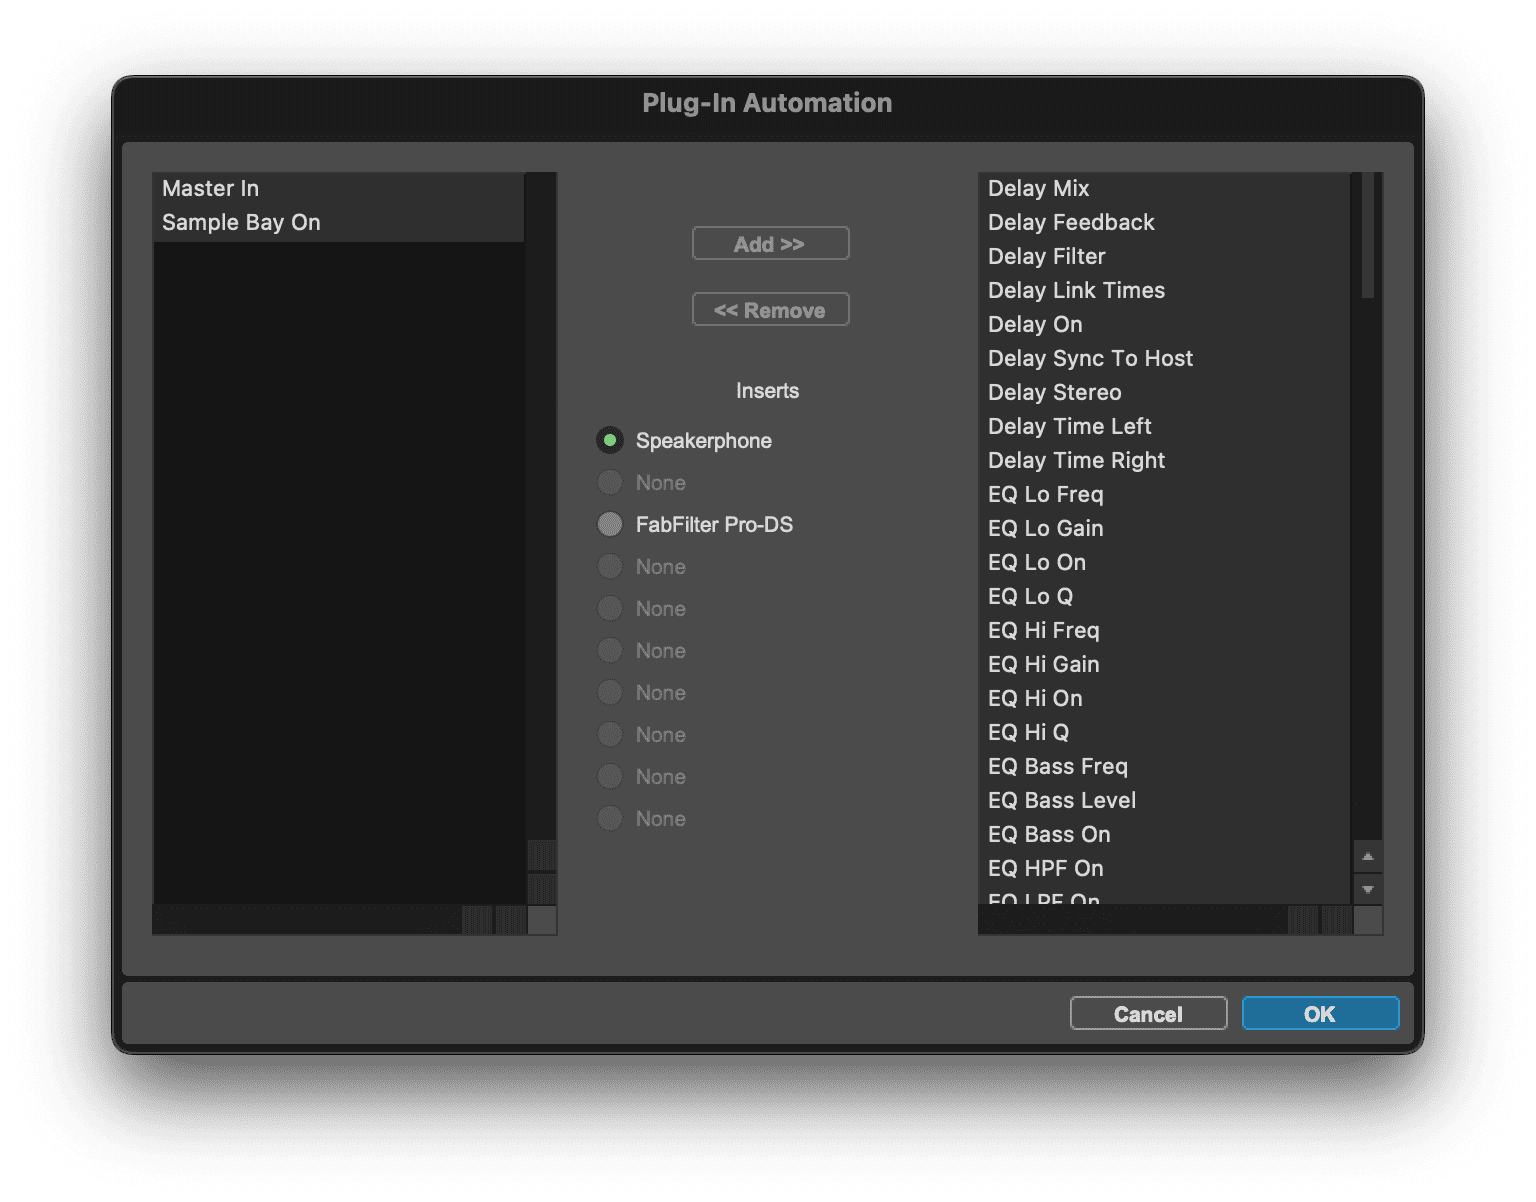
If you upgraded to Speakerphone 3, do enable to two newly added parameters for automation.
Pro Tools won't do that automatically for you.

Speakerphone 3 move samples
Yes, of course!
Hit the little triangle icon in the top right corner of the Samplebay module in Speakerphone.
Then from the menu that pops up you can open the current Samples folder. Then move this to an external drive and then in the Speakerphone plug-in open the same menu again and use the CHANGE SAMPLES FOLDER option to point Speakerphone to the new location.
Then quit and open your DAW and from then on Speakerphone should use the samples from the external drive.
Speakerphone 3 move samples
There will be no MAS Speakerphone 3 plug-in.
Before you upgrade to Speakerphone 3 please save the settings of your MAS Speakerphone 2 plug-in instances in your projects as Speakerphone presets (spp files). You can do this in the Speakerphone preset browser.
These will be converted by the Speakerphone 3 installer so you can load your settings into your Speakerphone 3 Audio Unit instances when you replace them. In case in a while you need to turn back to an old project where you have not done that we can provide temporary licenses so you can do this still.

You can also use this handy preset converter app to convert old presets to the new one.
Download Preset Converter app
If Speakerphone 2 is gone after you updated Pro Tools to 2023.3 (or later) and you are on a Apple Silicon Mac (M1/M2/M3 ARM) then you have to open Pro Tools Using Rosetta to get Speakerphone 2 working.

Speakerphone 2 requires Open Using Rosetta on the Apple silicon (M1/M2/M3/etc) macs. Speakerphone 3 adds native support for apple silicon. You can check your upgrade options here.
You need to open Pro Tools using Rosetta in order to use Speakerphone 2.
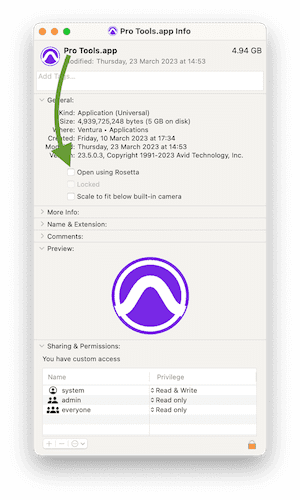
To ensure Pro Tools opens using Rosetta:
  • open the Finder
  • go to the Applications folder
  • select the Pro Tools app
  • hit get info
  • tick the box to Open Using Rosetta.
Open Pro Tools using Rosetta
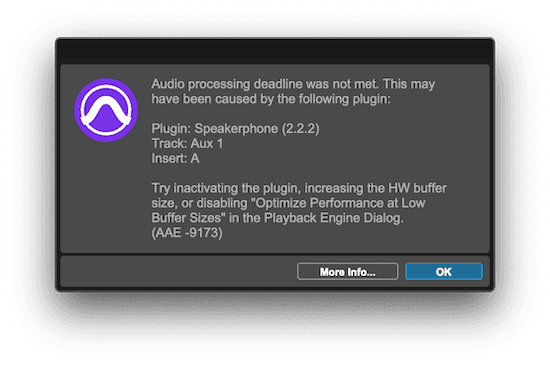
In Pro Tools 2024.3.1 & 2024.6 this AAE-9173 error can occur when a clip is played back through the Speakerphone 2.2.2 AAX Plug-In.
AAE-9173
This problem only occurs on Intel macs with Pro Tools 2024.3.1 & 2024.6 and Speakerphone v2 (not v3!).
You can workaround this problem by Updating Pro Tools to 2024.10 or up.
If updating Pro Tools is no option, then you can try these workarounds:
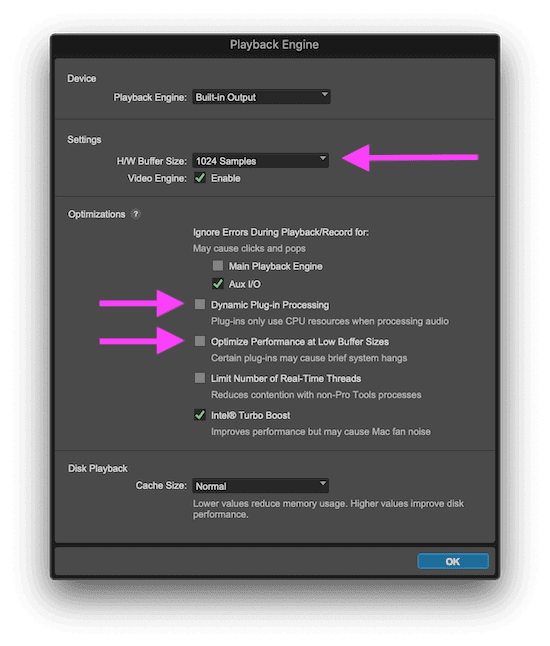
  • Increasing the H/W Buffer Size in the Pro Tools Playback Enging settings
  • Disabling Dynamic Plug-in Processing in the Pro Tools Playback Engine settings
  • Disabling Optimize Performance at Low Buffer Sizes in the Pro Tools Playback Engine settings
  • Or reverting to an earlier Pro Tools (in Pro Tools 2024.3 this error does not occur).
Pro Tools playback engine settings to prevent the AAE-9173 error
By granting this directory read & write permissions for all users an admin user can enable all users on Windows to use the Speakerphone VST (or AAX) plug-in:
C:\ProgramData\Audio Ease\Speakerphone

Without setting this Speakerphone will crash when a non-admin user tries to use the plug-in.
The challenge/response hard disk authorization is only available in the older (32 bits only) Speakerphone 2.0.5.
You are free to use this one instead of the latest, the 2.0.5 installer is available from the downloads page.

We strongly discourage running this old Speakerphone 2. This version will not be updated anymore. We recommend to use the latest Speakerphone 2.1. This one does require the iLok (2nd generation or up) key yes. Whenever your ilok key breaks or you loose it, we will always help you (supply a new license for a replacement key).
Most likely the Speakerphone 2.1 installer removed the resources from an older Speakerphone 2.0.5 installation however the installer failed to remove the Speakerphone 2.0.5 RTAS plug-in. When Pro Tools 10 now loads the Speakerphone 2 RTAS you get this error message. Then later Pro Tools scans the AAX and decides not to load the RTAS anymore.

Solution:
We need to fix this in the installer of course, but when you delete the Speakerphone.dpm (the RTAS plug-in) from: /Library/Application Support/Digidesign/Plug-Ins/ this error message will be gone.

Altiverb 7

If Altiverb 7 is gone after you updated Pro Tools to 2023.3 (or later) and you are on a Apple Silicon Mac (M1/M2/M3 ARM) then you have to open Pro Tools Using Rosetta to get Altiverb 7 working.

Altiverb 7 requires Open Using Rosetta on the Apple silicon (M1/M2/M3/etc) macs. Altiverb 8 adds native support for apple silicon. You can check your upgrade options here.
You need to open Pro Tools using Rosetta in order to use Altiverb 7.
To ensure Pro Tools opens using Rosetta:
  • open the Finder
  • go to the Applications folder
  • select the Pro Tools app
  • hit get info
  • tick the box to Open Using Rosetta.
Open Pro Tools using Rosetta
Problem: Non-readable text in the Altiverb 7 user interface.
Solution: Follow this guide to allow Altiverb to access the font again:
https://support.apple.com/en-gb/guide/font-book/fb34862/mac

Altiverb uses the system font Arial. Altiverb does not install this, it should be on your macOS by default. If your system does not have the Arial font or the macOS system prevents Altiverb somehow from using it, Altiverb could look like this:
Altiverb 7 font missing or blocked
Problem: Installed or updated Altiverb 7 and now it does not show up in Logic.
Solution: Restart your mac.

Somehow (we are still trying to find out why) the macOS ignores Altiverb 7 until the computer has been restarted. This is why Logic (or Ableton Live, or any other DAW that uses Audio Unit plug-ins) does not show the Altiverb
Altiverb 7 Regular and XL sound exactly the same and come with the same IRs.
There are three differences:

Altiverb 7 Regular supports
  • up to stereo input and output
  • sampling rates up to 96kHz
  • plug-in formats on windows: aax native and vst, on mac: aax native, vst, audio unit, mas and rtas
Altiverb 7 XL supports:
  • up to 5.1 surround in and output
  • sampling rates up to 384 kHz
  • all plug-ins formats Altiverb 7 Regular supports + TDM on Mac OS X

So, in short, if you do not have sessions on 192k and you work in stereo only, Altiverb 7 Regular will do just fine.
If, at a later stage, you would like to upgrade from Regular to XL this is possible. The upgrade cost is just the price difference so you won't loose any money going for Regular first.
Problem: The IR set gets downloaded when you click the download button in the NEWS section in the IR Browser. It starts downloading but then nothing happens, the set does not load or show up.

When this happens the Altiverb plug-in fails to copy/move the downloaded IR set to the Audio Ease IRs folder.
It could be Altiverb is not allowed to write in the Audio Ease IRs folder.

Solution: Try locating the folder in the finder (or explorer), hit get info and then verify your user (and the admin group) can read&write in the folder. If you make changes make sure to also apply to all enclosed items too. If this does not help, try using the default location as IRs folder:
/Users/Shared/Altiverb/IRs

You can change the IR folder location in the preferences tab in the Altiverb plug-in:

Altiverb 7 ir folder location in preferences
Altiverb 7 supports loading your own files as IRs.
Any wav audio file can be used as impulse response.

Simply add your file(s) to your User Created IRs folder, the default location is:


macos user library folder
* Please note the MacOS system hides the Library folder in your user folder. You can still open this folder through the GO menu in the Mac finder. Then hold down the option (alt) key and a link to the User Library will magically appear.

Your third party impulse responses folders, libraries can be loaded through:
/Users/Shared/Altiverb/Third Party libraries

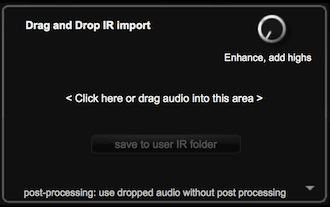
If you have recorded the Altiverb sine sweep to create an IR, then drag your mono or stereo recordings as wave file onto the drag and drop import window in the Altiverb plug-in. You can choose to save your IR into the User Created IRs folder.

Altiverb 7 ir import
There is a little trick you need to pull off to get this to work:
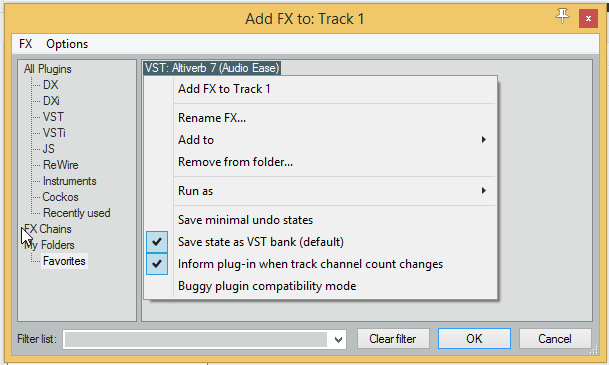
  • open the add fx window in Reaper on the 6 channel track
  • then right click on the Altiverb plug-in and make sure this option is checked:
  • ☑️ inform plug-in when track channel count changes

av7 reaper surround settings

When you then insert Altiverb 7 it should become 6 in 6 out and you will be able to choose the surround IRs in the IR Browser.
Most likely you were working with old older (version 7.0/7.1) IR set before and you recently installed the latest Altiverb 7 plug-in updater. This new Altiverb 7 plug-in however requires the latest core IR set.
To fix this please download the latest first time full Altiverb 7 installer and run this.
Once you installed this you will have all IRs again.

> You can request a link to the latest downloads at:
www.audioease.com/download
Altiverb 7 Windows Authorization Error: Altiverb 7 Regular cannot run because it is corrupted please try reinstalling the product

This error means the graphics card driver on your system is not up to date. Even when Windows states this is up to date, Altiverb 7 can generate this error and you will find there is a newer driver available (and this will solve this error).

Please try to update your graphics card driver.

Find out what graphics card you have in your system (right click on your desktop, choose change screen resolution, hit advanced settings, that would show you the manufacturer’s name and the model).
Then please go to the manufacturer’s website, hit support/drivers and find the latest driver for your graphics card and download and install this.
Restart your computer.
The problem should be gone now.
There is a situation where the Altiverb plug-in can revert to default settings when loading a project in Digital Performer.

This is caused by the fact the Digital Performer (DP) supports three plug-in formats: MAS, AU (audio unit) and VST.

How?
Example: When you save a project with the Altiverb MAS plug-in. And you then change the default plug-in type in DP to AU and re-open this project. DP will load Altiverb, but DP fails to transfer the saved Altiverb MAS plug-in settings to the now Altiverb AU plug-in, and Altiverb then reverts to loading the default settings (which is the Teldex IR).

When this suddenly occurs you are most likely using a different plug-in format then you used before. Try to find out what you used before, force DP to load this Altiverb plug-in from the plug-in settings in the DP preferences and then restart DP and re-open your project. The right settings should load again then.

If you need any help with this let us know. Send us for instance a project file that will not open correctly, then we can quickly help you out.
The macOS Altiverb 7.4.3 installer currently fails to install the screen saver. You can download the screen saver and copy it to:/Library/ScreenSavers/

Screensaver
What is the difference between the mono to stereo and the stereo to stereo options in a stereo out Altiverb ?

Best way to understand this is to go back with me to our sampling session when we recorded to room's acoustics for the IR in Altiverb.

mono to stereo
We put a single speaker in the center of the stage and two mics in the audience.

This results in a mono to stereo IR.
When you playback your audio through this IR in Altiverb, it will sound like your audio comes out of that single speaker from the center of the stage (mono!) picked up with two microphones (stereo!).
This IR gives a stereo reverb, however the input is (mixed to) mono, as there is only a single source on stage.

When you want to process a vocal (mono) or direct recorded electrical guitar or something where the panning is not important the mono to stereo IR will do just fine (pro: costs half of the processing then a stereo-to-stereo IR, so it is more efficient in cpu and memory).

stereo to stereo
back to recording the room
this time we put two speakers on stage, one on the left and one on the right side of the stage and we record again with the two mics in the audience.

When you playback your stereo audio through this IR in Altiverb your stereo signal comes out of these two speakers.
Easy to picture here that your original panning will be maintained using a stereo to stereo IR.

So basically it comes down to this:
is your input stereo or is it panned in stereo ?
use a stereo - stereo IR, else you will loose the stereo information in the reverb (although the reverb is stereo).

Sometimes even when using stereo panned sources a mono to stereo IR can be preferred as you do not want the panning to be reflected in the reverb levels. But this is a mixing decision which depends on taste mostly (and music style) and I dare not to advice on that :-)
We have removed some sets from the Altiverb IR library (mainly user submitted IR sets) that do not meet up to our current standards. The Speakers and Phones set is one of these. You can copy the original set from your Altiverb 6 Impulse Responses folder (if you still have this) to the Third Party IRs folder in the Altiverb 7 Impulse Responses folder.
Then you can then load these IRs again in Altiverb 7.

You can also download the original set from:
http://fokkie.home.xs4all.nl/IR.htm

Snapper

Snapper could act weird on your macOS system. In these ways: Snapper does not (always) appear when selecting audio file or Snapper crashes on quitting the application or preferences are not recalled properly.
Some check box has to be checked in the Mac OS System Preferences to ensure Snapper works properly. Maybe this somehow did not work on your system.

Please try this:
  • first quit Snapper (make sure it is not running)
  • then delete the Snapper preferences file: com.audioease.snapper.plist. This file is the Preferences folder in the User Library. Open the Mac Finder, hit the GO menu, hold down the option (ALT) key and a link to the Library folder will appear. Go to the Preferences folder and delete the file.
  • then please restart your mac (important)
  • now run snapper
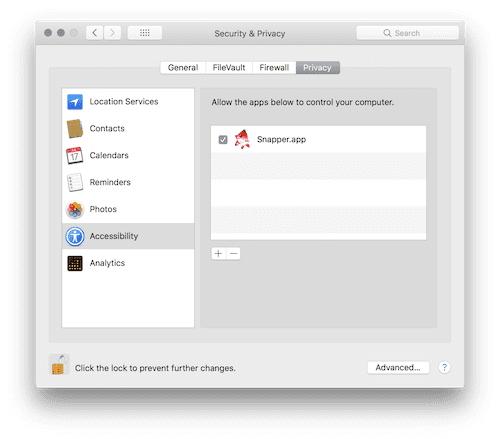
  • open the mac os system preferences
  • go to the security and privacy settings panel
  • then to the privacy tab
  • select the accessibility panel on the left
  • open the lock on the bottom left (and fill in your password) to make changes
  • if Snapper is listed here, please select it and hit the - (minus) button to remove it from the list
  • now quit and run snapper and it should be added to the list again
  • make sure the box for Snapper is ☑️ checked. If it IS already checked then please un-check and ☑️ re-check it
  • quit and start Snapper
snapper 2 vital macos system setting in security and privacy panel
Snapper opens when you select any file that contains audio, also video files.
This sometimes is a problem, when you want to use the space bar to quickly preview the video in the finder.
There is a simple hack for this:

Use: SHIFT + SPACE BAR to preview the video

This works, even when Snapper is showing you the audio waveform of your selected video in the finder.
Snapper uses a temp folder to write the drag export files (selections) into when you drag (a selection) out of Snapper. Somehow on your system Snapper is unable to write in this folder.

By default the drag export folder is:
/Users/Shared/Snapper

You can check in the Snapper preferences what you currently use. Open Snapper, go to the preferences, open the export tab, then close to the bottom you should find:

snapper drag export folder preference
Hit the Folder... button to change the location (we recommend this: /Users/Shared/Snapper)
When this is set, quit Snapper, then start Snapper and then check in the Snapper Preferences if this option is still set correctly.
If not, we have to reset some things, see below.**
If the folder is correctly set, then let's open the /Users/Shared folder in the Finder, select the Snapper folder, hit get info and under sharing & permissions ensure your user and the everyone group are set to Read & Write.
Hit the circle with the three dots and hit 'apply to enclosed items'.
Now dragging audio (selections) out of Snapper should work again.

** If the settings in the Snapper preferences do not stick, something's wrong.
This problem is most likely solved by removing the Snapper cache and preferences.

Open the Mac Finder, hit the GO menu, hold down the option (ALT) key and a link to the Library folder will appear. Open the Caches folder and delete these four folders: com.audioease.snapper
com.audioease.snapper.filestate
com.audioease.snapper.view
com.audioease.snapper.waveform

Go to the Preferences folder and delete this file:
com.audioease.snapper.plist

Then restart the mac (this is important, as the macOS caches the prefs).
You can request your Snapper activation code by clicking on the Lost / forgot key code link at:
https://www.audioease.com/snapper/#support
This can be handy when you lost or misplaced the key code to unlock the Snapper demo to the full version.

Store / purchase / upgrade

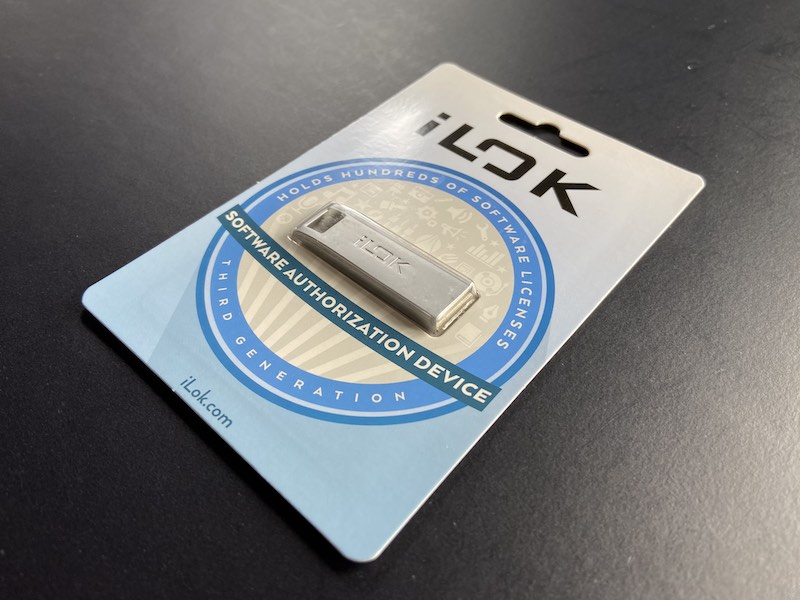
The iLok USB key available for purchase at audioease.com is the USB A type, not USB C.

iLok USB key USB A packaging
Any piece of old software can be upgraded to the current version at:
https://www.audioease.com/store/#upgrade

The upgrade requires:
  • we still sell this software
  • your old copy has not been upgraded to the latest before
  • you know your registered email address
  • If you live outside the European Union (EU) and not in the United Kingdom (UK) then you do not pay sales tax at audioease.com.
  • If you purchase as a EU/UK business with a valid sales tax registration number (BTW), (you can provide this on the address page) then you do not pay sales tax.
  • If you are from the EU/UK and you do not have a business sales tax number, you pay local sales tax (BTW) on the downloads and Dutch sales tax (BTW, 21%) on the USB keys.
  • If you are located in The Netherlands you always pay sales tax.
Audio Ease does not extend educational discounts.